

The secret to the best camp coffee isn’t some complicated formula or a pile of expensive gear. It’s all about making smart choices—finding that perfect balance between incredible flavour, pack weight, and sheer simplicity. A genuinely great cup of coffee out in the wild can elevate the entire experience, turning a simple morning ritual into a memory you’ll savour.
Why Great Coffee Makes Camping Better
Picture this: you’ve just woken up, the air is crisp, the view from your tent is breathtaking, and you’re wrapping your hands around a warm, aromatic mug of coffee. It’s a moment of pure magic. That daily ritual we often rush through at home becomes something mindful and grounding when you're in nature. It’s more than just a caffeine kick; it’s the satisfying start that fuels your day's hike, paddle, or quiet moments by the fire.
This guide is designed to cut through the noise and focus on what actually works. We'll look at the real challenges of brewing outdoors—from unpredictable weather to a limited kit—and show you how to nail a fantastic brew every time, without weighing down your pack.
Balancing Flavour and Practicality
The real art of exceptional camp coffee is hitting that sweet spot between taste and convenience. You don’t need to haul a barista’s entire setup into the bush to get a cafe-quality cup. It’s all about understanding the trade-offs.
For instance, packing a small manual grinder adds hardly any weight but gives you a massive flavour boost compared to pre-ground beans. It’s a small effort for a huge reward. Likewise, picking the right brewing method for your trip—whether you’re an ultralight backpacker or on a family car camping adventure—means you’re not carrying anything you don’t need.
A few simple principles will guide you:
- Prioritise Freshness: Nothing beats the vibrant taste of whole beans, ground right before you brew.
- Embrace Lightweight Gear: Modern materials like titanium give you incredible durability without the weight penalty.
- Master a Simple Method: It’s far better to be an expert at one or two simple techniques than to fumble around with something overly complicated.
- Plan Your Provisions: A great cup of coffee is just one part of a memorable camp meal. Beyond your morning brew, exploring options for delicious and practical provisions, such as the best vegan camping food, can complete your outdoor culinary experience.
The real magic of camp coffee is how it forces you to slow down and be present. The simple act of boiling water, grinding beans, and carefully brewing connects you to your surroundings in a powerful way.
The Role of Quality Gear
Choosing gear that’s both durable and lightweight is non-negotiable. Sure, a flimsy plastic dripper might save you a few grams, but one crack and you're left coffee-less. This is where your choice of materials really matters.
An item like a titanium mug, for example, not only keeps your coffee piping hot but is tough enough to handle years of rough treatment on the trail. It won’t absorb old flavours or add a metallic taste, so every cup is as clean and pure as the last. Investing in quality gear is one of the cornerstones of a great camp coffee setup.
For more ideas on kitting out your camp kitchen, you can find some great inspiration in our guide to the best camping gadgets. This approach turns your coffee from an afterthought into a cherished part of every adventure.
Finding Your Perfect Camp Brewing Method
Let's be honest, choosing how to brew your coffee in the bush is the single biggest decision you'll make. It’s a constant balancing act between the flavour in your mug, the weight on your back, and how much fuss you’re willing to put up with before you’ve had your first sip. But don't worry, there's a perfect method for every kind of adventurer, from the ultralight trekker to the glamping enthusiast.
Think of it like picking your hiking boots. A heavy, rugged leather boot gives you maximum support on rough trails, much like a French Press delivers a rich, full-bodied brew but adds weight and cleanup. On the other end of the spectrum, a lightweight trail runner is nimble and fast—just like an AeroPress, which pumps out a clean, complex cup with impressive speed and portability.
Your ideal method has to match your camping style. We'll break down the most popular options to help you find that perfect fit, making sure your morning coffee ritual is a highlight, not a headache.
The Classic French Press
The French Press is a campsite staple for good reason. It’s an immersion brewer, which simply means the coffee grounds hang out and steep directly in the water. The result? A rich, oily, and full-bodied cup with a really satisfying texture. It’s also incredibly forgiving; you need a coarse grind, which is easy to get right, even with a basic hand grinder.
If you're car camping or heading out with a group where weight isn't a huge issue, a tough, insulated French Press is a brilliant choice. Modern stainless steel versions can take a beating and will keep your brew hot for that all-important second cup. The main trade-offs are the bulk and the cleanup—you’ve got to scoop out all those wet grounds and pack them out, following Leave No Trace principles.
The Refined Pour-Over
For the camper who values flavour clarity above all else, the pour-over is your champion. This method is all about pouring hot water over a bed of ground coffee sitting in a filter cone, letting the good stuff drip straight into your mug. It produces an incredibly clean, bright, and nuanced cup that really lets the unique tasting notes of your beans sing.
Pour-over drippers come in all shapes and sizes, from collapsible silicone models that squash flat to elegant, feather-light titanium designs. This makes them surprisingly packable, perfect for backpackers who refuse to compromise on taste. There is a bit of a learning curve—getting your pour speed right takes practice—but nailing it is so rewarding. Plus, cleanup is a breeze: just pack out the used paper filter.
The Versatile AeroPress
The AeroPress has built a massive following among coffee lovers, both at home and in the wild, and it's easy to see why. It's a master of speed, versatility, and fantastic flavour. Using air pressure, it forces water through a compact tube of coffee grounds to produce a smooth, low-acidity brew that’s almost like a shot of espresso. You can drink it straight or add hot water for a top-notch Americano.
Its tough plastic construction and all-in-one design make it a backpacker's dream. Cleanup is genius—just push the plunger and a dry "puck" of coffee grounds pops right out into your rubbish bag. The only real catch is its smaller brew capacity, which makes it ideal for one or two people at a time.
This decision tree gives a great visual of the trade-offs between flavour, weight, and simplicity for each method.
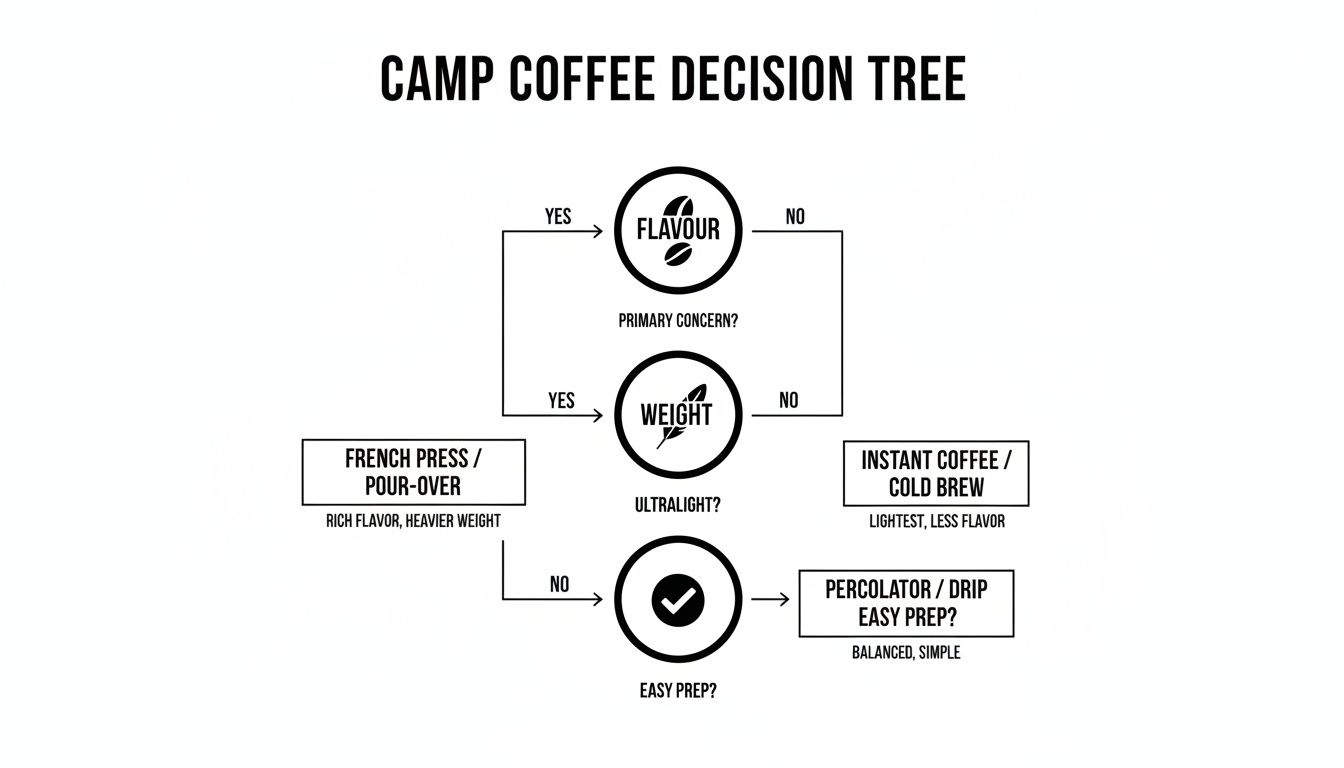
As you can see, if flavour is your number one priority, pour-over is hard to beat. But if you're chasing simplicity, a French press or even quality instant coffee might be your best bet.
Comparing Camp Coffee Brewing Methods
To make things even clearer, here’s a quick breakdown of how the most popular brewing methods stack up against each other in the great outdoors.
| Brewing Method | Best For | Weight & Packability | Ease of Use & Cleaning | Flavour Profile |
|---|---|---|---|---|
| French Press | Car camping, groups, rich flavour lovers | Heavy & Bulky: Best when space isn't a concern. | Easy to Brew: Very forgiving. Hard to Clean: Messy grounds. | Rich, full-bodied, oily |
| Pour-Over | Backpackers, flavour purists, solo campers | Very Light & Packable: Collapsible models exist. | Requires Practice: Pouring technique matters. Easy to Clean. | Clean, bright, nuanced |
| AeroPress | Backpackers, solo/duo trips, versatility | Light & Compact: Self-contained and durable. | Fast & Simple: Very intuitive. Easiest to Clean. | Smooth, low-acidity, espresso-like |
| Cowboy Coffee | Minimalists, emergency backup | Ultralight: No extra gear needed. | Easy but Messy: Takes practice to avoid grounds. | Bold, gritty, rustic |
| Instant Coffee | Ultralight hikers, speed and convenience | Lightest Option: Just single-serve packets. | Easiest & Fastest: Just add hot water. | Varies: Quality has improved dramatically. |
Ultimately, the best brewer is the one you’ll actually enjoy using day after day on the trail. Each method offers a different experience, and finding the right one is part of the fun.
If you really want to get into the nitty-gritty, this Ultimate Brewer Showdown comparing French Press, AeroPress, and V60 is a fantastic deep-dive into how these titans of the coffee world compare.
When you're making your final choice, just keep these factors in mind:
- Trip Type: Are you thru-hiking for a week or just car camping over the weekend? Weight and bulk are everything for the first, but not so much for the second.
- Group Size: Brewing for yourself is one thing; making coffee for a crew of four is another. Make sure your brewer can handle the volume.
- Your Coffee Preference: Do you crave a heavy, bold cup, or do you prefer something clean and delicate? Let your taste buds lead the way.
Your coffee setup is just one piece of your camp kitchen puzzle. To see how it fits into a complete, lightweight system, check out our guide on essential titanium camping cookware, where top-tier durability meets minimalist design.
By thinking through how you camp and what you really want from your morning cuppa, you can pick a brewing method that will deliver a perfect, soul-warming coffee every single time, no matter how far from home you are.
Assembling Your Ultimate Camp Coffee Kit
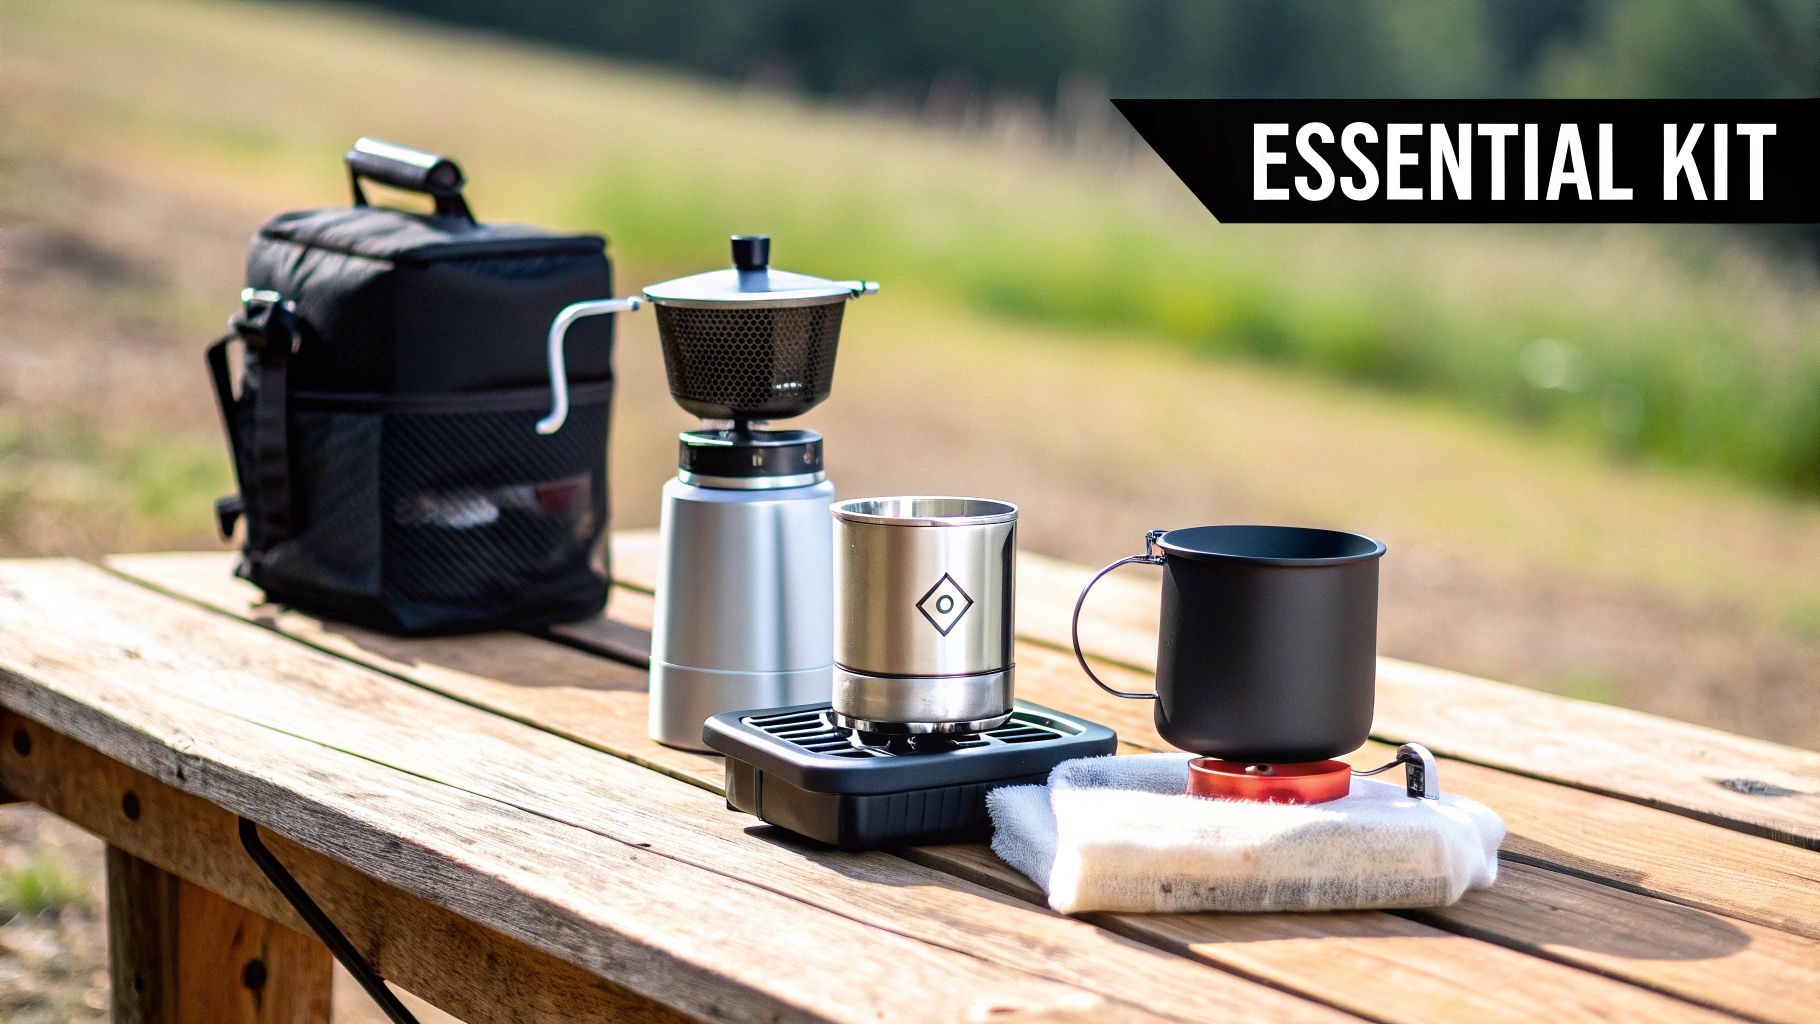
So, you’ve picked your favourite brew method. What’s next? It's time to build the support system around it. After all, making a truly great cup of coffee in the wild is a team effort. The right gear can take a good brewer and make it exceptional, ensuring every moment—from grinding the beans to that first glorious sip—is as good as it gets.
This isn’t about cramming your kitchen into a backpack. It’s about being smart and selective, choosing minimalist, high-performance tools that just work. We’re going to focus on the three absolute essentials: a solid heat source, a quality grinder, and the perfect mug to drink from.
The Foundation: A Dependable Heat Source
First things first: you need hot water. While there's a certain romance to brewing over a crackling campfire, it’s often wildly impractical and unpredictable. For consistency and speed, nothing beats a dedicated camp stove.
The right stove really comes down to how you camp. If you're car camping, a classic two-burner propane stove is stable and powerful. For hikers and anyone trying to save space, though, a canister stove system is the undisputed champion.
These little powerhouses are brilliant.
- Speed: Most can get water to a rolling boil in just a few minutes, even if it’s a bit windy.
- Control: You get precise flame adjustment, which is crucial for getting the water temperature right without scorching it.
- Efficiency: Modern designs are incredibly frugal with fuel, so a small canister can easily last you several days of morning brews.
A stove system like a JetBoil or an MSR PocketRocket is the reliable foundation your entire coffee ritual is built on. Without consistent heat, even the best beans and brewer in the world won’t save you.
The Game Changer: A Quality Manual Grinder
Here's the single biggest leap you can make in flavour: grind your beans moments before you brew. It's a non-negotiable for incredible coffee. Pre-ground coffee goes stale fast, losing its aromatic oils and vibrant flavours almost immediately. By packing whole beans and a hand grinder, you keep all that goodness locked away until you're ready to unleash it.
Think of it like the difference between a freshly picked herb from the garden and one that’s been sitting in a jar for six months. The vibrancy is on another level. A good manual grinder doesn't have to be heavy or bulky, either. Many modern options are compact, lightweight, and built tough enough for the trail.
Investing in a quality manual grinder is the highest-impact upgrade you can make to your camp coffee kit for the lowest weight penalty. It ensures you capture the peak flavour potential of your beans, every single time.
When you're choosing one, look for conical ceramic burrs. Blade grinders just smash and chop beans into inconsistent bits, but burr grinders crush them to a uniform size. That consistency is the secret to an even extraction, giving you a balanced, delicious cup without the bitterness that comes from a poor grind. It’s a small detail that makes a huge difference.
The Final Touch: The Perfect Mug
Your mug is so much more than just a cup; it's the final piece of the puzzle. The wrong one can suck the heat out of your coffee, add a weird metallic taste, or just weigh down your pack. This is where your choice of material becomes critical, and for the outdoors, one material stands head and shoulders above the rest: titanium.
Titanium just seems custom-made for camping. Its strength-to-weight ratio is off the charts, meaning you get a mug that can survive being dropped or squashed in your pack without adding any noticeable weight.
But the real magic of titanium is its purity.
- Taste Neutrality: It’s completely inert, so it will never impart a metallic taste to your drink. You taste your coffee, not your cup.
- Durability: It’s ridiculously resistant to corrosion and scratches, so it’s basically a buy-it-for-life bit of gear.
- Heat Retention: A double-walled titanium mug offers fantastic insulation, keeping your coffee piping hot to the last sip without burning your hands.
Imagine a mug that feels almost weightless, keeps your brew perfectly warm against the morning chill, and guarantees that the clean, pure flavour of your carefully chosen beans is all you taste. That’s what a great titanium mug delivers. For those ready to complete their setup, checking out options like the lightweight and durable Everti Titanium Mug 400ml is the perfect next step.
By thoughtfully picking these three core components—stove, grinder, and mug—you’re not just buying gear. You’re building a cohesive, efficient, and lightweight system that promises a superior cup of coffee, no matter where you wake up.
Choosing the Right Beans for the Trail
Long before you even flick the striker on your camp stove, the fate of your morning brew has already been sealed. It’s a simple truth: your coffee is only ever as good as the beans you start with. Picking the right ones for the trail is all about balancing fantastic flavour with the realities of the outdoors, and it’s what separates a forgettable cup from a truly memorable one.
The first big decision you’ll make is whether to pack whole beans or pre-ground coffee. Sure, pre-ground is convenient, but that convenience comes at a big cost to your tastebuds. Coffee beans are like little time capsules, packed with aromatic oils that create all those incredible smells and flavours. The second they’re ground, that timer starts, and the magic begins to fade.
Bringing whole beans and a small hand grinder is a tiny weight penalty for a massive upgrade in quality. That burst of aroma when you grind fresh beans in the crisp morning air? It’s part of the whole experience, and it leads to a cup that’s infinitely more vibrant and complex.
Whole Beans vs Pre-Ground
Think about the difference between a freshly picked herb and one that’s been sitting in a jar for six months. It’s night and day. The same idea applies to your coffee. If you’re chasing the best possible flavour, whole beans are the only real choice.
-
Whole Beans: This is where you'll find peak freshness and flavour. All the delicate oils are locked safely inside the bean right up until the moment you're ready to brew. This is the path for anyone who refuses to compromise on taste.
-
Pre-Ground Coffee: The clear winner for convenience. If you’re packing ultralight or just want a fuss-free setup, it’s a perfectly good option. To get the best out of it, just make sure you grind the beans right before you leave home and store them in a properly airtight container.
Finding the Perfect Roast
Once you’ve settled the whole bean versus pre-ground debate, it’s time to think about the roast. While personal preference is king, some roast profiles are just a bit more forgiving and versatile when you're brewing out in the wild.
For most camp brewing methods, a medium roast is a fantastic all-rounder. It hits that sweet spot with a full body and a pleasant acidity, avoiding the intense bitterness a dark roast can sometimes have or the tricky nature of a light roast. From a French Press to a Pour-Over, medium roasts are a reliable and delicious choice.
Dark roasts can also be a great fit, especially for rugged methods like Cowboy Coffee or a French Press, where their bold, smoky notes can really sing. As for lighter roasts? With all their delicate and nuanced flavours, they’re often best saved for when you’re back home and have more control over your brewing variables.
To keep your beans at their best, you need to protect them from their three biggest enemies on the trail: oxygen, moisture, and any strong odours from the other gear in your pack. A high-quality, airtight container isn't a luxury—it's an essential piece of kit.
The Rise of Quality Instant Coffee
Alright, let's talk about the elephant in the room: instant coffee. It’s had a bad rap for years, but the specialty instant coffee on the market today is a completely different beast from the bitter dust you might remember. For ultralight hikers or anyone who values speed above all else, it's a surprisingly good option.
Australia's coffee scene is a perfect example of this. Despite a world-class café culture, instant coffee remains incredibly popular, making it a natural fit for getting a quality fix while camping. This love for convenient, high-quality solutions helps explain why durable, non-toxic gear like titanium drinkware has become so essential for outdoor lovers. You can dig deeper into Australia's evolving coffee habits to see the trends.
These days, high-end brands are producing single-serve sachets that dissolve into a genuinely complex and tasty cup of coffee. While it might not replace a freshly made pour-over for the true coffee purist, stashing a few packets in your pack as a lightweight backup is always a smart move. It means a satisfying caffeine hit is never more than a few seconds away, no matter where you are.
Mastering Your Brewing Technique in the Wild
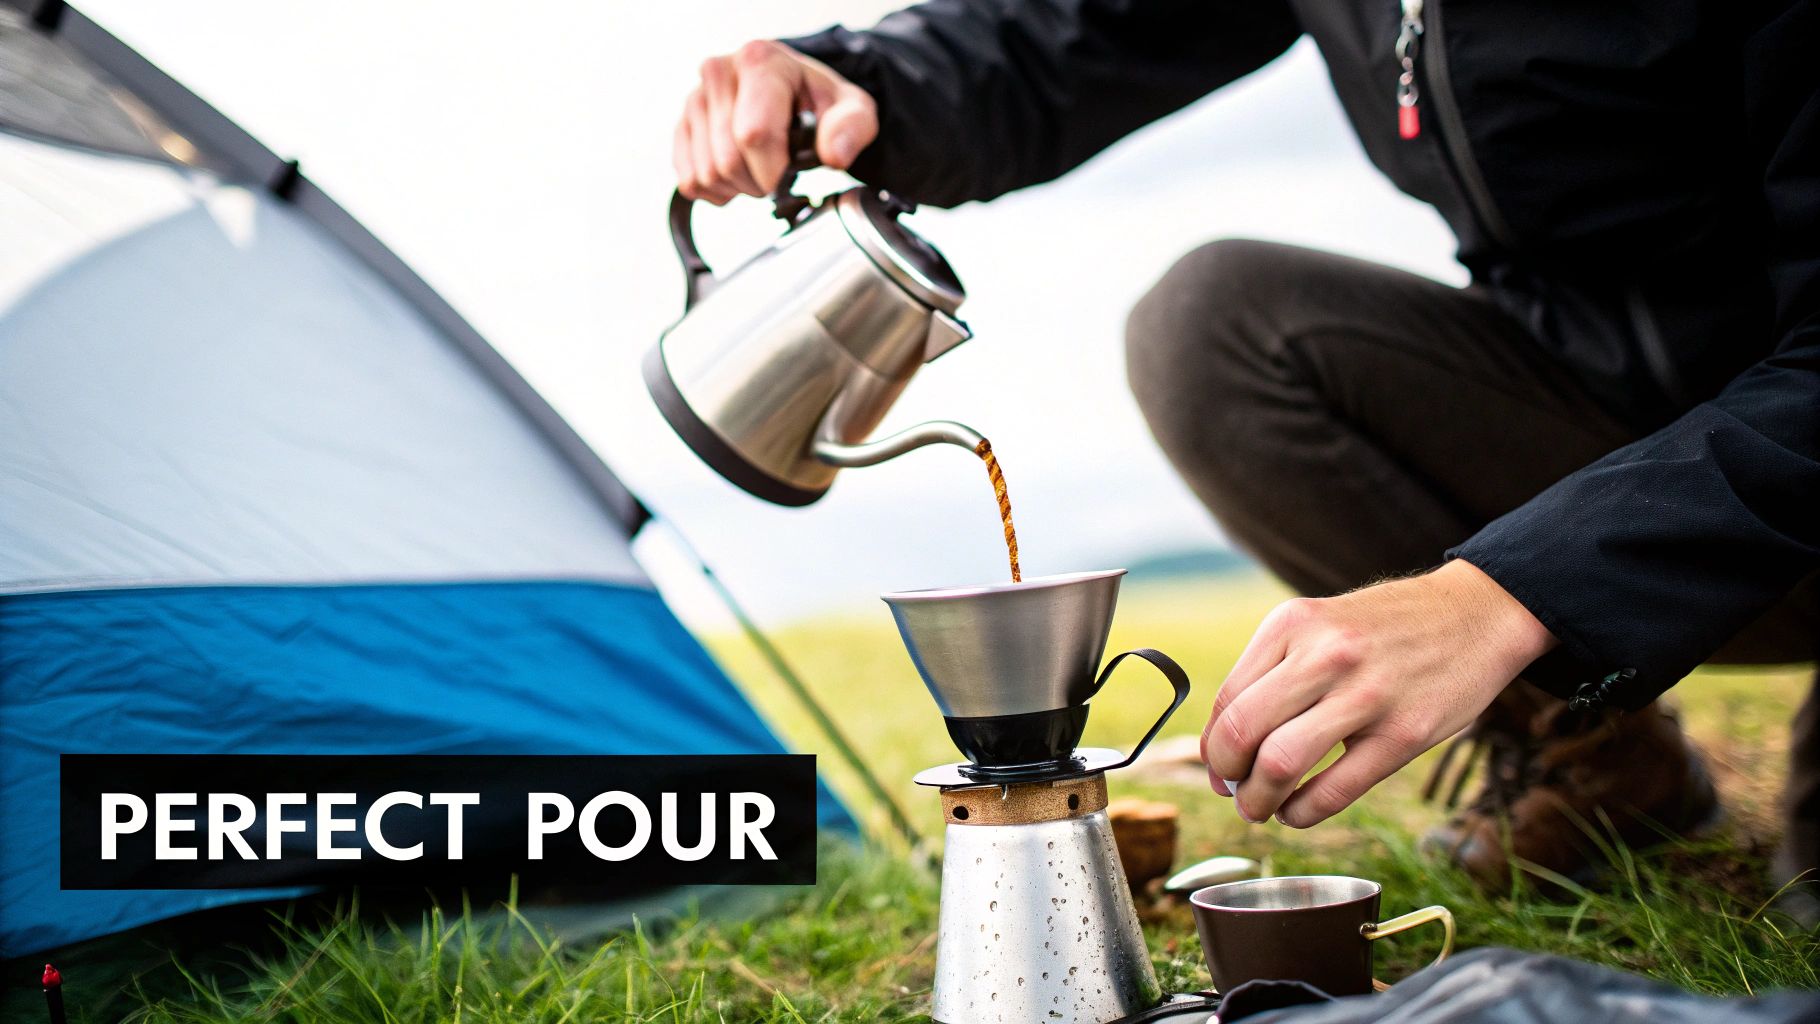
Brewing coffee in your kitchen is one thing, but making it outdoors is another beast entirely. Wind, cold air, and a minimalist kit throw a few spanners in the works, and a promising brew can quickly turn into a disappointing one. Nailing your technique in the wild isn't about getting complicated; it’s about adapting a few key principles to the world around you.
This is where you learn to rely on your senses and a bit of outdoor creativity. The reward? A cup that not only tastes incredible but feels earned—a small victory against the elements that makes the whole ritual so much more satisfying. This is how you go from just making coffee to becoming a true camp barista.
Nailing Your Water Temperature
Getting your water temperature right is make-or-break for a great brew, but let's be real, nobody is packing a thermometer. You’re aiming for a sweet spot between 90°C and 96°C. That’s hot enough to pull out all the good stuff but not so hot it scorches the grounds and makes your coffee bitter. A full, rolling boil is 100°C, which is way too aggressive.
So, how do you hit the mark without any gadgets? Just use your eyes and ears.
- Look for the “Fish Eyes”: As the water heats up, you'll see tiny bubbles start to form at the bottom of the pot. When they're about the size of a fish's eye, you're getting very close.
- Listen for the Simmer: Right before it erupts into a full boil, you’ll hear a gentle, steady simmer. That's your signal to pull the pot off the heat.
- The 30-Second Rule: If you get distracted and it hits a proper boil, no worries. Just take it off the stove and let it stand for 30 to 60 seconds. It will cool down right into that perfect brewing zone.
This simple observational trick is surprisingly accurate and stops you from accidentally making a burnt, bitter brew.
Perfecting the Coffee to Water Ratio
Consistency is your best friend out here, and that starts with a reliable coffee-to-water ratio. While a pocket scale is the gold standard for precision, you can absolutely get by with some simple volume-based measurements. A great place to start for most brewing methods is a 1:15 ratio—that’s one part coffee to fifteen parts water.
Practically speaking, that works out to be about two level tablespoons of ground coffee for every 180ml of water, which is your average small camping mug.
The secret to a consistently balanced cup is getting your ratio right. Don’t just guess—use your mug or a scoop to measure. It’s the easiest way to eliminate a weak or overwhelmingly strong brew and find that perfect middle ground.
If your brew tastes a bit weak or sour, just use a little more coffee next time. If it’s too strong or bitter, dial it back. After a couple of mornings, you’ll have your personal ratio locked in for your favourite mug.
Mastering the Pour-Over Bloom
If you're using a pour-over, the "bloom" is a non-negotiable, game-changing step. This is where you pour just a little hot water over the grounds to let them "bloom," or puff up. As they do, they release trapped carbon dioxide, which is crucial for an even and flavourful extraction.
Here's the simple process:
- The Initial Pour: Gently pour just enough hot water to evenly wet all the coffee grounds. You're aiming for about twice the weight of the coffee itself.
- Wait and Watch: Now, just let it sit for 30 to 45 seconds. You’ll literally see the coffee bed swell and bubble up as the CO2 escapes.
- Continue Your Pour: Once the bloom has settled back down, you can start pouring the rest of your water in slow, steady circles.
Skipping this step is a fast track to a weak, under-extracted cup because the water just channels straight through without grabbing much flavour. Taking that extra half-minute to let your coffee bloom ensures every single grind is ready to give up its goods.
Finally, a couple of extra tips can make a world of difference. If it's windy, set up your stove behind your pack to act as a windscreen—it'll help the stove run efficiently and keep your water hot. And before you brew, pour a splash of hot water into your titanium mug and swirl it around. This pre-warms the metal, helping your coffee stay hotter for much longer against the cold morning air.
Your Camp Coffee Questions Answered
Even the most seasoned outdoor enthusiast runs into a few snags trying to brew the perfect cup of coffee in the wild. You've got the gear, you've got the beans, but questions still come up. From shedding grams in your pack to cleaning up responsibly, let's get into the most common queries I hear.
Think of this as your field guide for troubleshooting your camp coffee setup. A few simple answers can make all the difference between a frustrating morning and a perfect brew to start your day.
What Is the Lightest Option for Making Camp Coffee?
For the ultralight crowd where every single gram is scrutinised, nothing beats high-quality instant coffee or those little single-serve coffee bags. All you need is hot water and a mug. They're practically weightless, making them the go-to for thru-hikers and bikepackers.
But if you can't live without a fresh brew, a simple titanium or plastic pour-over dripper is your best bet. It’s incredibly light and packs down to almost nothing. Pair it with a tough titanium mug, and you've got an amazing balance of rich flavour for a tiny weight penalty.
How Do I Clean My Coffee Gear at a Campsite?
This is a big one. Cleaning your gear properly always comes back to Leave No Trace principles. The number one rule? Always pack out your used coffee grounds. Never, ever scatter them on the ground.
Cleaning the gear itself is pretty straightforward:
- Take your brewer apart.
- Give it a good rinse with a small splash of hot water. Make sure you're at least 60 metres away from any rivers, lakes, or streams.
- If you have some stubborn coffee residue, a little bit of sand and a good scrub works wonders as a natural, low-impact abrasive.
I've found that uncoated titanium gear is a dream to clean. Its natural surface often just needs a quick wipe with a cloth, which saves you both water and hassle.
"Your responsibility as a camper doesn't end when the coffee is brewed. Proper cleanup, especially packing out all food waste like coffee grounds, is a critical part of preserving the wild places we love to visit."
Should I Bring Whole Beans or Pre-Ground Coffee?
Ah, the classic flavour vs. convenience debate. Let's be honest: whole beans will always give you a fresher, more flavourful cup. Grinding them right before you brew keeps all those volatile oils intact – that’s where the incredible taste and aroma come from. For any true coffee lover, a small manual grinder is well worth the space.
That said, there's absolutely nothing wrong with prioritising a quick, no-fuss morning. Pre-ground coffee is a perfectly good option. The trick is to grind your beans right before you leave for your trip and store them in a small, completely airtight container. This will help you hang on to as much of that freshness as possible.
What Is the Best Way to Heat Water on the Trail?
For reliability and speed, you can't beat a canister stove system. These little jet engines are compact, give you fantastic temperature control, and can boil water in a flash, even when it's windy or cold. If you're car camping, a bigger propane stove is just as effective.
Sure, you can heat water over a campfire where permitted, but it’s a lot less predictable and will leave your cookware caked in soot that's a pain to scrub off. Using a lightweight titanium pot will always get your water boiling faster and help you conserve fuel, which makes the whole process a lot more efficient.
Ready to build the ultimate, lightweight coffee kit for your next adventure? At Everti, we design lifetime titanium essentials that are built to perform in the wild and elevate your daily rituals. Discover our collection of durable, taste-neutral mugs and cookware.