

You lift the pan, see the stuck-on egg, and the whole thing feels settled before you've even started. Maybe it's a greasy film that won't rinse off, maybe it's a chalky haze, or maybe the surface still looks fine but food has started clinging in a way it never used to. A clean frying pan is not just about making it look tidy, it's about keeping the part that cooks intact.
The mistake is treating every pan like a plate. Plates want a quick wash and a dry wipe. Pans have a surface layer, a working surface, and a base underneath that all respond differently to heat, water, detergent, and abrasion.
Australia's food supply already gives a useful baseline here. The 27th Australian Total Diet Study tested 30 PFAS compounds across 1,336 food samples and only detected PFOS, in under 2% of samples, with overall dietary exposure below the tolerable daily intake, so the bigger question for most households is how to care for the pan you use every day, not panic over every non-stick label FSANZ. That's why the practical job is to match the cleaning method to the material, the damage, and the food that just came out of it.
The Pan on the Stove Right Now
The pan in your hand usually falls into one of three states. It has food residue on the cooking surface, cosmetic wear that looks worse than it is, or real damage that changes how it cooks. Those are different problems, even if they all read as “dirty” at first glance.
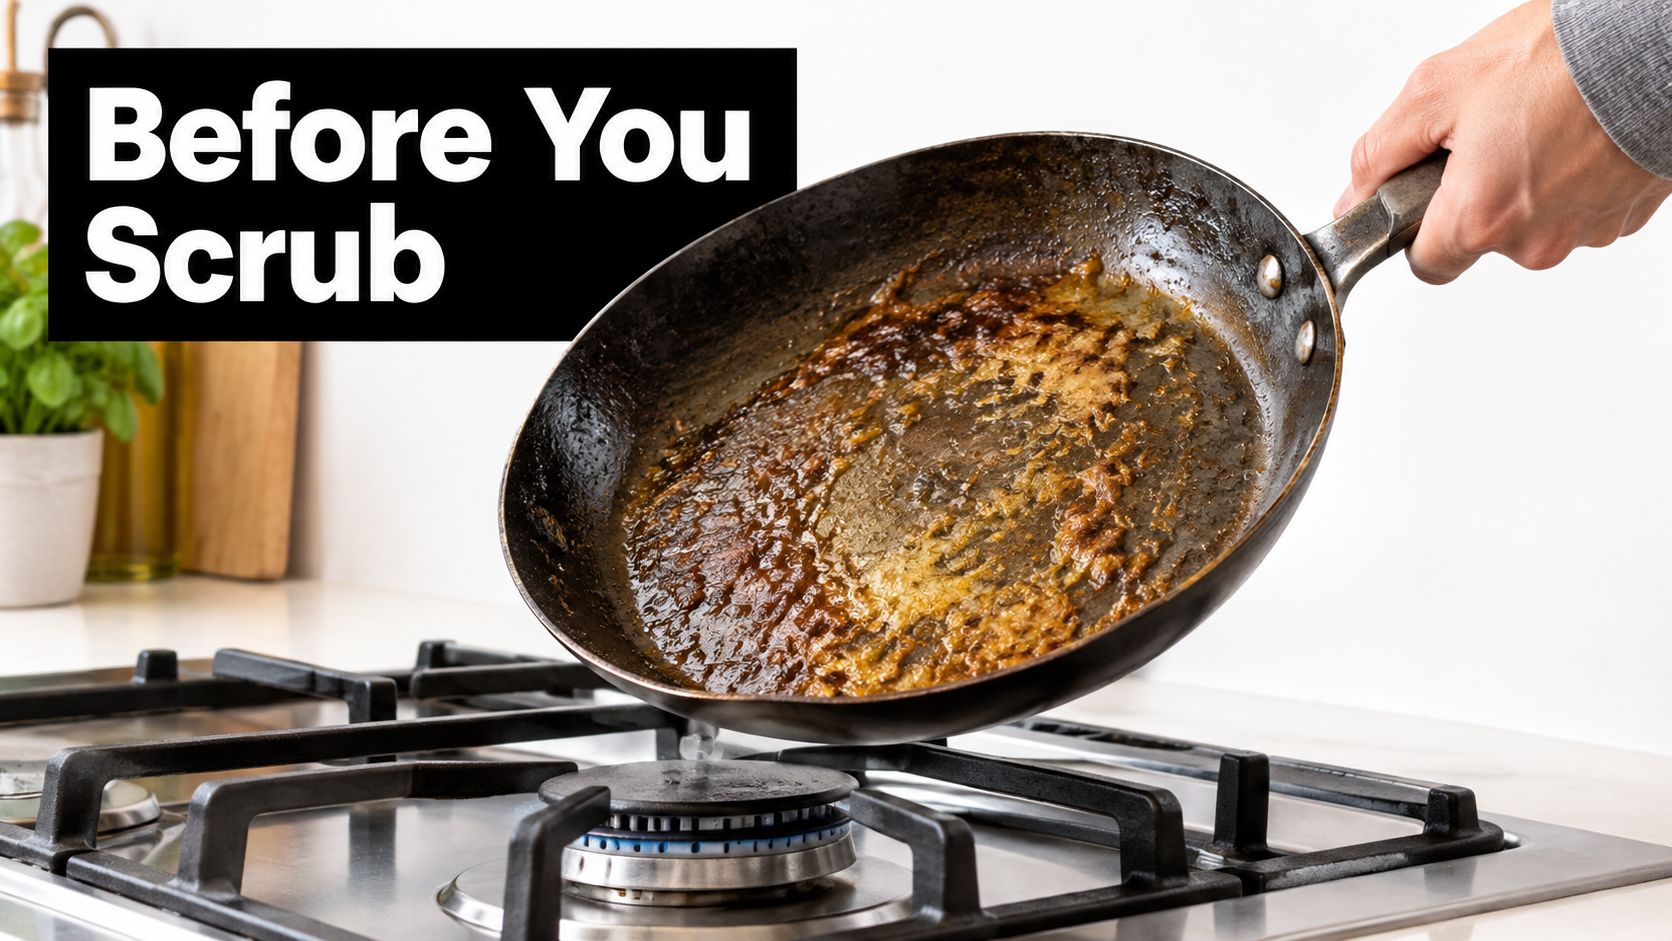
Think in layers, not just shine
A pan works as a system. The coating or seasoning is the part that meets the food, the substrate is the metal underneath, and the base metal gives the pan its shape and heat response. If you scrub only for visual shine, you can wear down the layer that does the cooking.
That matters because a non-stick pan, a cast iron pan, a stainless pan, and an uncoated titanium pan do not need the same treatment. A soft sponge can be right for one and useless for another. A stiff scraper can save one pan and damage the next.
A pan that looks clean can still cook badly if the working surface has been damaged.
The Australian food context also matters. Food Standards Australia New Zealand separates washing from sanitising. Washing around 54 to 60 degrees helps remove fats, and 77 degrees for 30 seconds is the hot-water sanitising step after raw-protein contact in food-business settings FSANZ. That split is the useful part for home cooks too. A pan can be clean enough for the next meal while still needing more careful handling after chicken, eggs, or seafood.
Use the right framework for the job
Remove loose food first, then wash with hot detergent water, rinse clean, and dry completely. After that, decide whether the pan needs recovery, seasoning care, or replacement. The order matters because a pan can look fine while the cooking surface is already starting to fail.
| Material | Best wash | Tools to use | Big no-no |
|---|---|---|---|
| Non-stick | Warm water and mild detergent | Soft sponge, soft cloth | Steel wool or heavy scourers |
| Stainless steel | Hot soapy water, then targeted spot treatment if needed | Non-scratch pad, cream cleanser | Harsh abrasion on the interior |
| Cast iron | Hot water, fast dry, then a light oil wipe | Stiff brush, paper towel, salt for tough residue | Long soaking or leaving it damp |
| Titanium | Warm soapy water | Soft cloth or sponge | Abrasive pads that needlessly roughen the surface |
A solid kitchen reset list helps too, especially if the sink has started collecting everything from the week. A practical deep cleaning kitchen checklist keeps the rest of the room from feeding the problem while you deal with the cookware.
The Four-Stage Wash That Works on Any Pan
A pan can look clean and still be in rough shape underneath. The coating, the metal body, and the cooking surface do different jobs, so they need different handling once the meal is over.
Start with scrape, not soak forever
Once the pan is off the heat and safe to touch, clear off the obvious residue first. That stops food from drying harder while you work around it. A wooden spatula, silicone scraper, or folded paper towel is usually enough for loose bits.
Then wash with hot water and detergent, using water in the 54 to 60 degree range when you can manage it. That heat helps move grease without driving protein and starch deeper into the surface. If the pan held raw meat, eggs, or seafood, sanitising is a separate step, not a substitute for washing.
Rinse clean, then dry completely
Rinse away all detergent. Leftover soap can change how seasoned or coated pans behave on the next cook. After that, let the pan dry fully before you put it away.
Air-drying is the safer finish. A damp tea towel can reintroduce grime, and storing a pan while it is still wet leaves the surface already compromised.
The order stays the same across materials, but the way you apply it changes. Some pans need gentler tools, some tolerate more scrubbing, and some only need a quick wash before the surface starts to suffer.
Pan Material at a Glance
| Material | Best wash | Tools to use | Big no-no |
|---|---|---|---|
| Non-stick | Warm detergent wash | Soft sponge, soft cloth | Abrasive pads |
| Stainless steel | Hot detergent wash, then rinse well | Non-scratch pad | Leaving food welded on overnight |
| Cast iron | Brief wash, then dry immediately | Brush, towel, burner heat | Soaking for long periods |
| Titanium | Warm detergent wash | Cloth or sponge | Aggressive scouring |
A full kitchen reset helps too. A practical deep cleaning kitchen checklist keeps the sink area, counters, and drying space from feeding grease back into cookware you have already cleaned. The goal is fewer repeat messes, not extra work.
Matching Method to Cleaner Pan Material
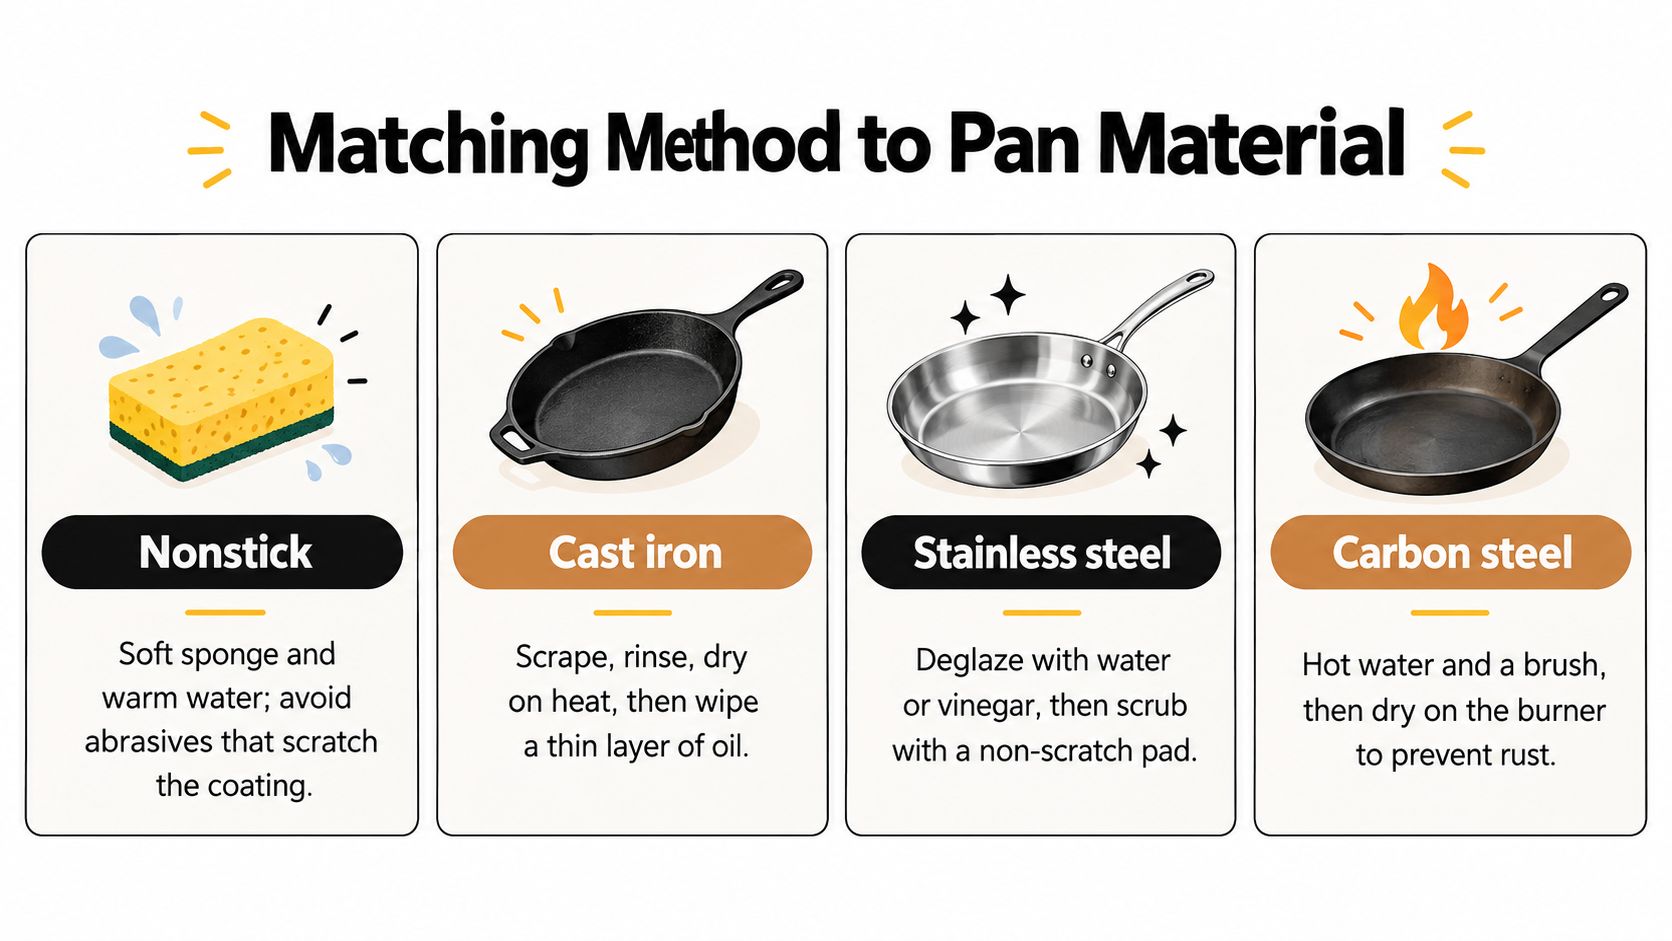
Non-stick needs restraint, not force
Non-stick is the easiest surface to clean and the easiest one to damage by overconfidence. Warm water, mild detergent, and a soft sponge usually get it done. If food has really welded on, soak first and let the residue soften rather than attacking the coating.
The red flags are visible scratches, flaking, or exposed substrate. Once the surface is damaged, the issue stops being just a clean-up problem and becomes a wear problem. A non-stick pan that has started shedding or sticking badly has reached the point where “cleaning harder” is the wrong answer.
Stainless steel can take more, but not anything
Stainless is more forgiving, which is why people often overwork it. A cream cleanser, a non-scratch pad, or a targeted deglaze with water can clear a lot of the ugly stuff without harming the pan body. Rainbow tarnish is usually cosmetic, not a sign that the pan has failed.
That said, the polished interior still deserves respect. Steel wool can be reasonable on an outside base with stubborn marks, but it's a poor habit on the cooking surface unless you're prepared to live with a rougher finish. If you're after practical help for ceramic-coated or non-stick style cookware, the Evo Dyne Products ceramic cleaning guide is a useful reference point for gentle surface care.
Cast iron is about preserving seasoning
Cast iron doesn't want a long soak. It wants fast cleaning, fast drying, and a thin oil wipe to keep the seasoning intact. For stubborn burnt-on residue, salt can work as a gentle scrub when paired with a little oil, but you still need to dry the pan properly afterwards.
The logic here is simple. The seasoned layer is not dirt, it's part of the cooking surface. Strip it back every time you clean, and the pan starts asking for rescue instead of routine care.
Titanium is the least fussy
Uncoated titanium is straightforward. Warm soapy water and a soft cloth usually solve the job, and there's no fragile non-stick layer to baby. That doesn't mean careless cleaning is fine, it means you can focus on hygiene without worrying about scraping away a coating.
A titanium pan is also a useful reminder that not every clean surface needs the same treatment. Some cookware needs preservation. Some just needs normal washing.
The wear issue matters most where coatings crack. Australian researchers found a single crack in a Teflon coating could release around 9,100 plastic particles, and modelling suggested up to 2.3 million microplastic and nanoplastic particles could shed from a broken surface Flinders University news. That doesn't prove illness, but it does explain why a damaged coating deserves replacement instead of endless scrubbing.
Removing Stuck-On Food Without Damaging the Pan
The easiest rescue starts while the pan is still warm. Deglaze first, scrub later. A splash of water is often enough to lift browned bits, and if you're cooking something especially sticky, that quick hit of liquid while the pan is warm can save a lot of abrasion.
Escalate gently
If the residue stays put, move in stages.
- Soak briefly: Hot soapy water for a short stretch softens grease and loosens bonded food.
- Simmer water: A shallow layer of water on the stovetop can release stubborn crust from compatible pans.
- Use a scraper: A wooden spatula or pan scraper at a shallow angle works better than brute force.
- Save the scrub pad for last: Use a non-scratch pad only on surfaces that can handle it.
A baking soda paste can help on stainless steel and cast iron, especially on browned patches that seem welded on. It's not a good default for non-stick, because the point there is to preserve the coating, not scour it into submission. If the pan is coated and the residue still won't move after a sensible soak, that is usually a sign to stop and reassess, not to escalate into damage.
Use the dishwasher carefully
For pans that are dishwasher-safe, the machine can do a decent job if it's run properly. Victorian food-safety guidance recommends the longest, hottest cycle with all surfaces exposed and says mixed chemical sanitiser should be discarded after 24 hours Victorian guidance. If food is still trapped under a handle, in seams, or around a rivet, the machine can't fix bad pre-cleaning.
A stubborn pan usually needs better timing, not harder scrubbing.
The goal is not to make every pan sparkle instantly. It's to get residue off without creating a rougher, shorter-lived surface in the process.
Cleaning Without Killing the Coating
A pan can look clean and still be worn out. A pale rainbow stain on stainless steel is mostly cosmetic, while scrub marks on the inside of a coated pan can shorten its useful life. Soap, water, and patience usually help. Wire wool, repeated vinegar soaks, and chasing a showroom shine on a surface that needs to keep cooking do not.
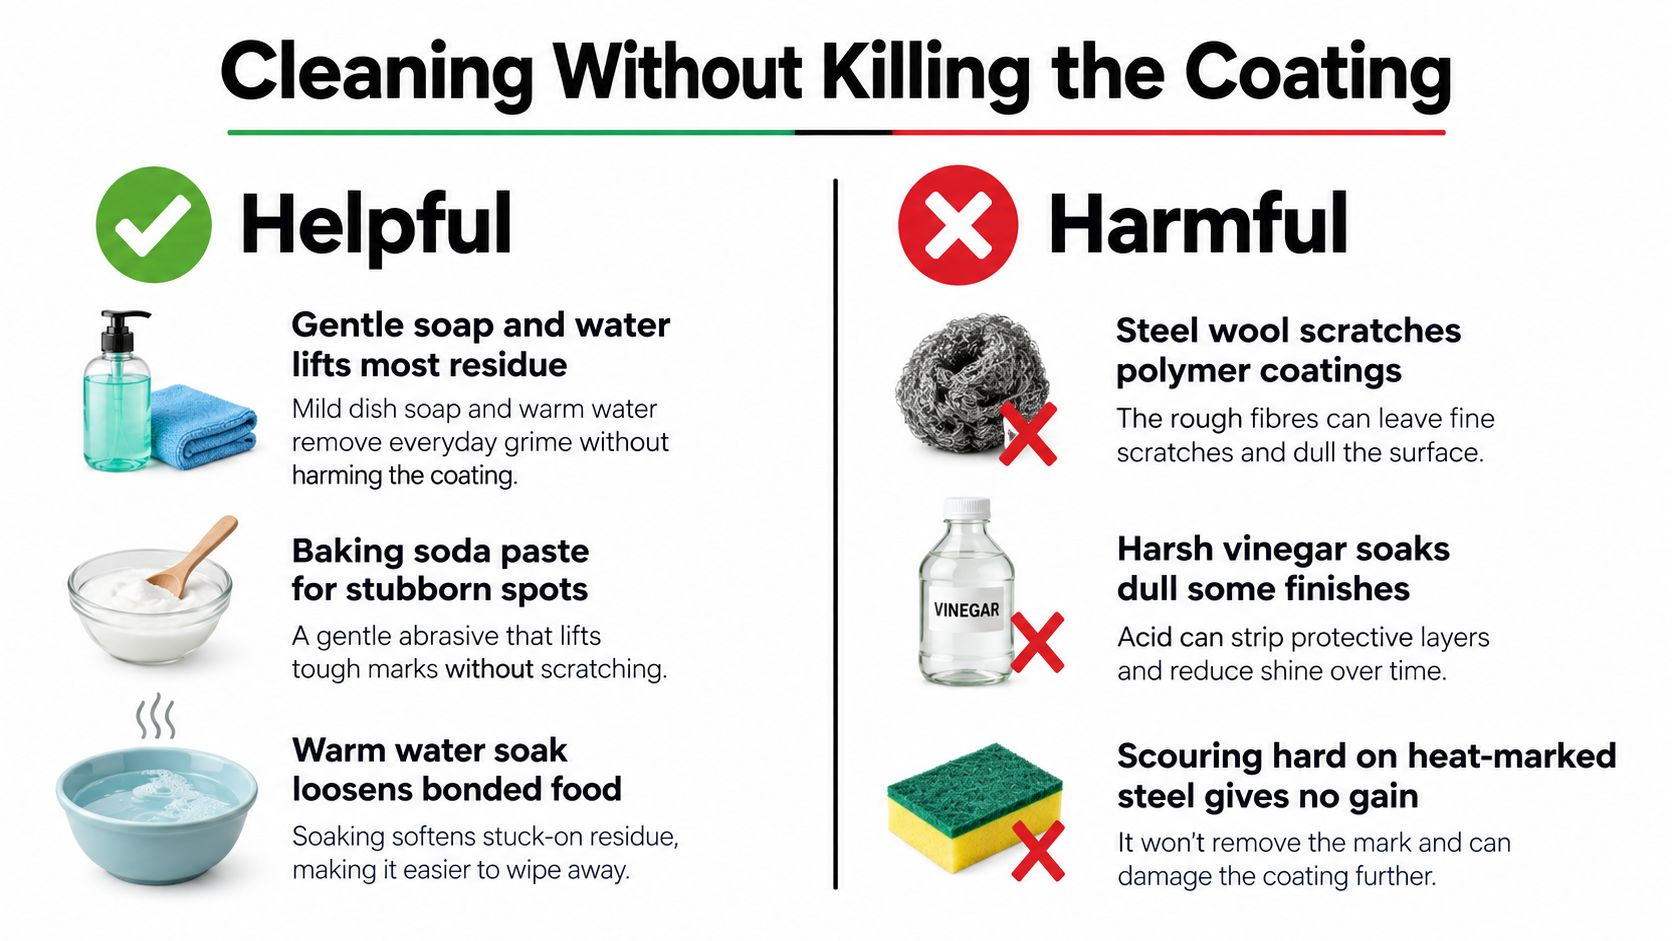
Cosmetic marks and real damage are different
A pan can look tired and still perform well. It can also look fine while the cooking surface is already failing. A practical check helps more than guessing. If water no longer beads and food keeps sticking in the same patch after a gentle wash, the coating is wearing out.
That distinction matters in real kitchens. People want safe food and a pan that keeps working, not a pan cleaned so aggressively that the surface suffers for the sake of appearances. CHOICE's summary of a 2025 Food Standards Australia New Zealand survey found 25.9% of Australians ranked food poisoning as the top food-safety concern, while 13.5% chose environmental chemicals in food CHOICE summary.
Gentle usually wins
Gentle soap and water are the starting point. A baking soda paste can help on stubborn spots, and a warm soak can loosen bonded food before you reach for anything harsher. Steel wool on polymer coatings, heavy scouring, and long vinegar soaks on finishes that do not like them can do more harm than the residue ever did.
For a coating-safe routine, see how to clean a non-stick pan without stripping the surface.
Cast iron follows a different rule. If the seasoning is patchy, the fix is usually oil and controlled heat, not scraping the pan back to bare metal. Coating, seasoning, and substrate do different jobs, so cleaning should suit the part that directly touches the food.
A good rule is simple. If your cleaning method changes the feel of the surface, it has probably moved from maintenance into damage.
What PFOA-Free Really Means for Your Pan
The label language around cookware can be more confusing than the cleaning itself. PFOA-free does not automatically mean PFAS-free, and PFAS-free does not mean coating-free. It only tells you something about the claim being made, not the whole construction of the pan.
Australia's rules help narrow the picture. From 1 July 2025, Australia banned the import, export, and manufacture of PFOA, PFOS, and PFHxS, though NSW Health notes that PFAS can still occur in some products and foods NSW Health. That makes it important to separate regulated substances from broader material categories when you decide how to clean, use, or retire a pan.
Read the claim, then read the surface
A PFOA-free non-stick pan still needs gentle handwashing, no metal utensils, and no aggressive scrubbing. The label doesn't make the coating immortal. It only tells you one part of the chemistry story has changed.
An uncoated titanium pan sits outside that label conversation entirely, which is one reason it appeals to cooks who want a simpler material profile. It still needs routine washing, though, because hygiene never goes away just because the surface is durable.
If you're trying to sort out PTFE versus the broader PFAS conversation, the Everti explanation of PTFE and Teflon gives a plain-language starting point. For readers comparing cookware care across brands and materials, a practical non-toxic cleaning overview like Gmaids green cleaning in Dallas can also help frame the difference between gentle cleaning and overprocessing a surface.
Disposal matters too
Once a coated pan is scratched, flaking, or no longer performing, the question becomes disposal, not more polishing. Bare metal can often be recycled if the substrate is clean enough, while coated pans are better treated as coated waste unless a local recovery option exists. The main point is not to keep using a pan long after the surface has stopped doing its job.
A clean pan is not just the one that looks tidy at the sink. It's the one whose material still matches the task on the hob.
Fixing the Five Most Common Pan Problems
White haze, rainbow tarnish, rust spots, warping, and lingering smells each have their own cause. The trick is to treat them as different problems instead of the same dirty-pan headache. That saves time and keeps you from reaching for the wrong remedy.
Quick diagnosis
- White haze: usually mineral buildup. A brief vinegar simmer can clear it on suitable pans.
- Rainbow tarnish on stainless: mostly cosmetic. A cream cleanser and a soft pad usually handle it.
- Rust spots on cast iron: clean with a salt scrub, then dry fully and refresh with oil.
- Warped base: that's not a cleaning problem. It's usually a replace situation, not a rescue mission.
- Lingering smells: a baking soda soak helps, and cast iron can also take a careful coffee-ground scrub if needed.
The order matters. Start with the least invasive method and stop once the symptom is gone. A pan does not become more valuable because you spent an extra twenty minutes rubbing at a stain that was never structural in the first place.
Keep a simple care calendar
A workable routine is easy to remember.
- After each cook: do the quick wash, rinse, and dry.
- Weekly: give the workhorse pans a deeper clean if they've picked up residue or odour.
- Quarterly: check for coating damage, rust, and surface changes.
- Retire the pan: if the substrate is exposed, warping is severe, or sticking returns after years of decent use.
That final rule saves the most money. People usually throw away pans too late, after they've spent months compensating for a surface that stopped working. A better habit is to treat the pan as a system, and replace it when the system no longer cooks cleanly.
If you want cookware guidance that treats hygiene, surface care, and long service life as one practical routine, visit Everti. Their titanium pieces fit neatly into the kind of low-fuss, low-residue kitchen this article is pointing towards, and they're a sensible place to start if you're ready to replace a pan instead of rescuing one that's already past its best.