

Allow roughly 3 minutes over medium heat for a sunny-side-up egg with a runny yolk, extending towards 4–5 minutes or using a lid when you want the white and yolk fully set. These times are estimates, not a food-safety guarantee.
The toast is nearly ready, but your egg has a crisp edge, a slippery patch beside the yolk, and no obvious sign that it's finished. Turning up the burner feels tempting. So does sliding it onto the plate and hoping for the best.
You don't need to choose between guessing and burning breakfast. Learning how long to fry an egg starts with recognising what your pan is doing, then separating your preferred texture from the safer cooking endpoint.
What Changes Frying Time Before You Crack the Egg
You've put the kettle on, taken an egg from the fridge, and reached for whichever frying pan is clean. That's an ordinary breakfast routine, but it also explains why yesterday's successful timing might disappoint today. Your starting conditions aren't necessarily the same.
Before cracking the shell, look at the pan, the burner, the egg, and whether you have a lid nearby. These are the practical variables identified in Australian egg-safety guidance for consumers, rather than reasons to chase a universal cooking time.
The visual below is a useful reminder to assess your setup before you begin.
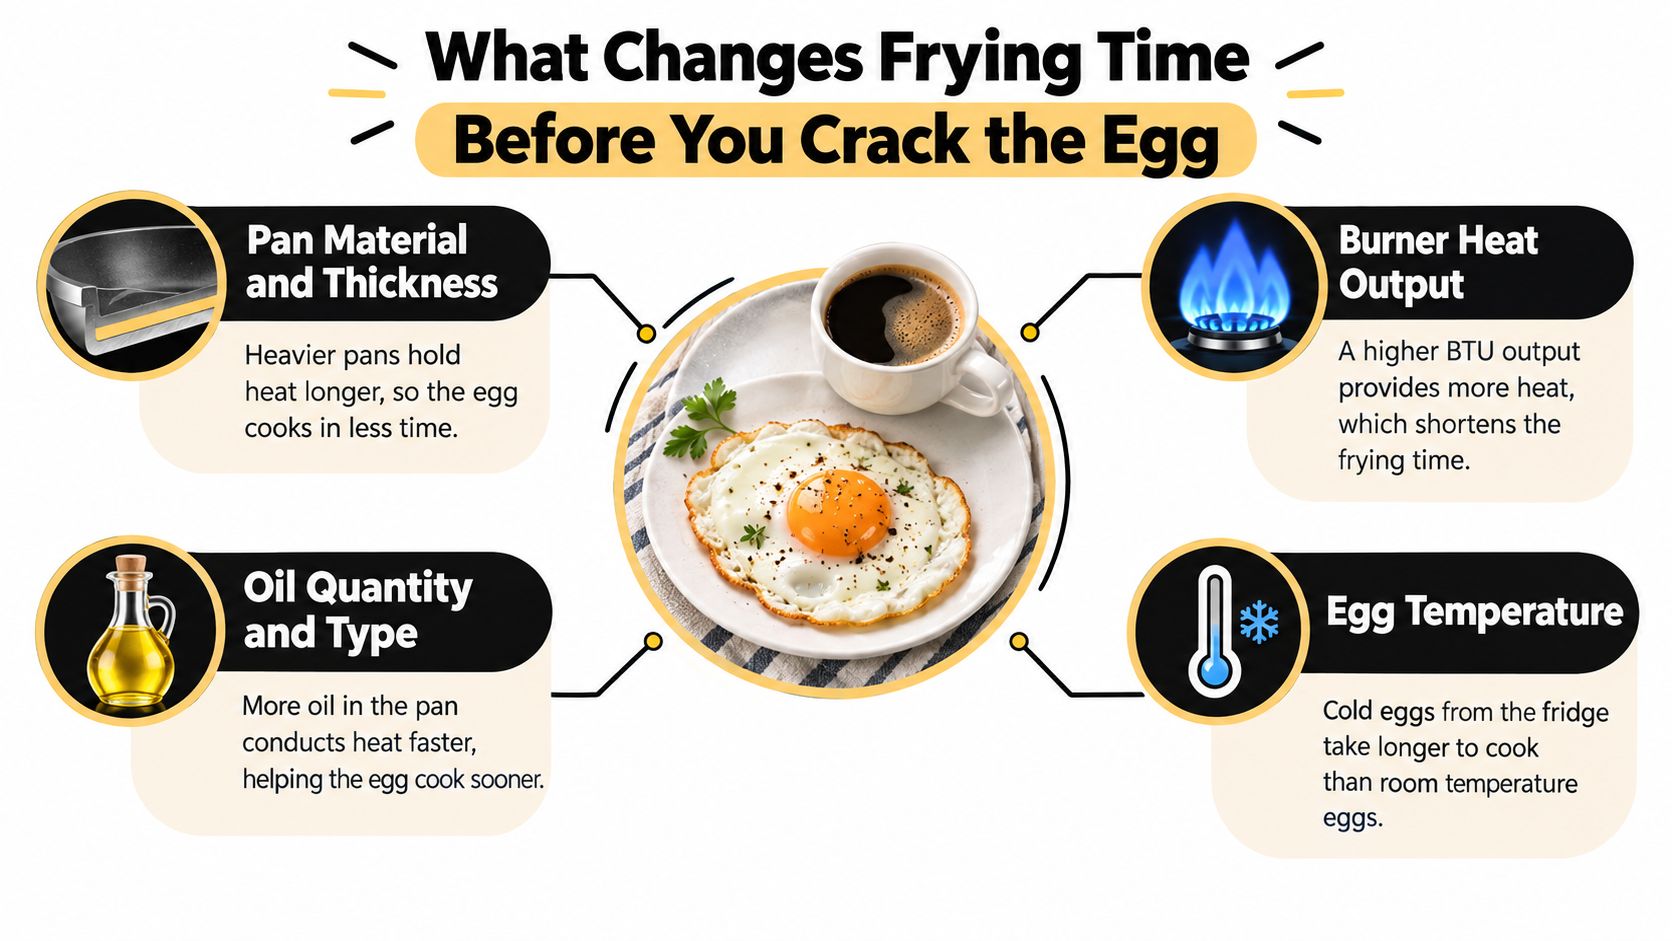
Read your setup before the clock
- Pan material and thickness: Treat the pan as part of the method, not an interchangeable container. Notice how it responds during preheating and whether the egg's underside colours before its upper surface sets.
- Burner strength: Medium is a starting setting, not a promise of identical heat on every stove. Watch the cooking response rather than assuming the position of the knob tells the whole story.
- Egg size and starting temperature: A larger or colder egg can need a different allowance from the egg you cooked previously. Don't force it to match yesterday's timer.
- Lid availability: Decide whether you're willing to cover the egg. That gives you another way to cook the upper surface without relying entirely on heat from underneath.
You're not trying to calculate breakfast like a laboratory experiment. You're making a useful prediction: does this setup call for closer attention to browning, or more patience while the upper white firms?
Practical rule: Use your usual pan and burner setting while you learn. Changing fewer things makes it easier to understand the adjustment that actually helped.
The Baseline Method for a Pan-Fried Egg
Start with a non-stick frying pan, a matching lid, a spatula, and enough oil to lightly coat the base. Keep your plate within reach so you aren't searching through a cupboard while the egg continues cooking.
The image below shows the pan-and-oil setup before the egg goes in. For this method, heat the oil before adding the egg rather than beginning with the egg in a cold pan.
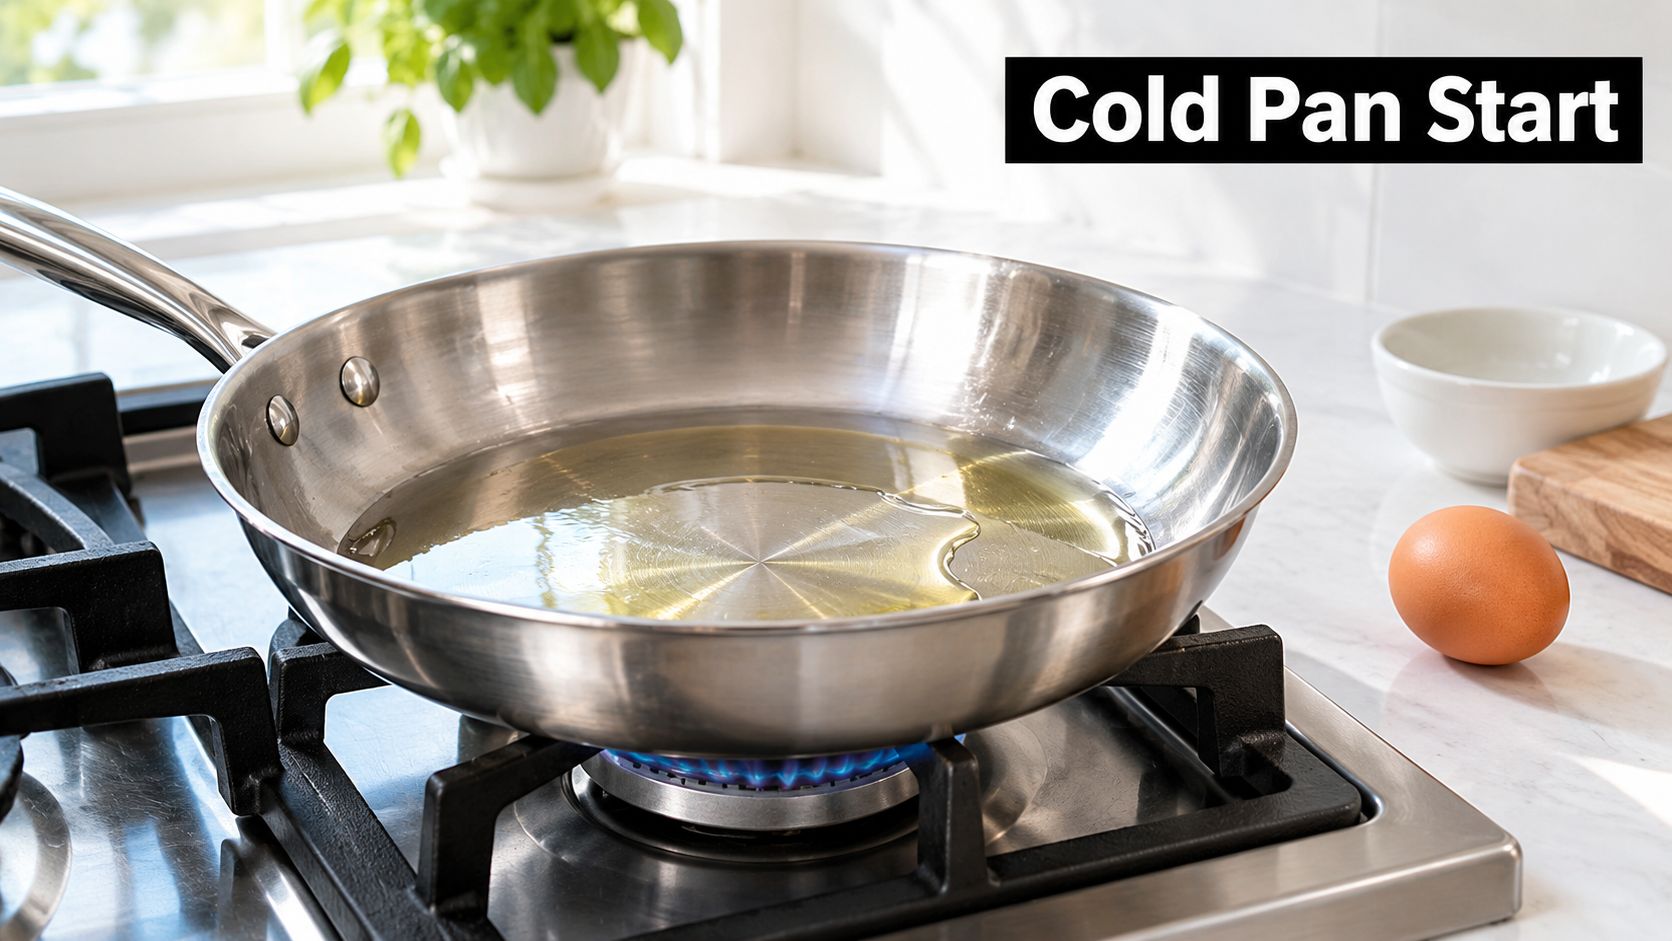
Heat first, then add the egg
Place the pan over medium heat and add the oil. If you're comparing pantry options, you can find natural frying oil through Vitamin Planet; choosing an oil doesn't remove the need to control the burner.
Gently tilt the pan to distribute the oil. You're looking for a hot, lightly coated cooking surface, not an aggressively spitting pan. Without a thermometer, don't try to assign an exact temperature to the oil's appearance.
Crack in the egg carefully and cover the pan. Leave the white undisturbed while it begins to set, rather than immediately pushing a spatula underneath it.
Choose the finish without rushing
When you lift the lid, look closely beside the yolk. The white should be opaque and set, not just cooked around its outer edge. Golden, curling edges can suit a runny-yolk finish, but they don't tell you what's happening inside the yolk.
For an over-easy egg, slide the spatula far enough underneath to support the egg before turning it gently. For an over-hard finish, continue cooking after turning until the yolk is firm rather than treating the flip itself as the endpoint.
- If the oil spits: Reduce the heat instead of trying to finish faster.
- If the base colours too quickly: Lower the burner and use the lid rather than accepting a browned base with an unset top.
- If the white resists the spatula: Pause before forcing it. Check whether you're trying to move a delicate, incompletely set egg.
This follows the approach in Australian Eggs' fried-egg method, which provides the culinary timing benchmarks below.
Timing Chart for Runny, Jammy, and Set Yolks
Choose the texture you want before cooking. Otherwise, it's easy to keep adjusting the egg without a clear stopping point, then discover you've passed the yolk consistency you wanted.
Runny means the yolk flows when cut. Jammy describes a thicker, soft centre rather than a fully firm yolk. Neither description, by itself, establishes microbiological safety.
Fried Egg Timing by Doneness
The sunny-side-up and over-easy times below are the Australian Eggs benchmarks cited above. There isn't an equivalent verified minute count here for jammy or fully firm fried yolks, so those rows deliberately use cooking endpoints rather than invented precision.
| Doneness | Time (medium heat) | Lid | Visual Cue |
|---|---|---|---|
| Runny, sunny-side-up | Approximately 3 minutes | Covered | White opaque and set; yolk remains fluid |
| Runny, over-easy | Approximately 3 minutes, then 30 seconds yolk-side down | Cover initially, then uncover to flip | White set; yolk still soft |
| Jammy | Continue beyond the runny stage; no fixed benchmark | Cover and reassess | Yolk thickened rather than freely flowing when cut |
| Fully set, sunny-side-up | Continue until both white and yolk are firm | Useful for cooking the top | No visibly liquid white; yolk firm |
| Over-hard | Flip, then continue until the yolk is firm | Optional after turning | White and yolk fully set |
Use the chart as a choice, not a countdown
For a runny egg, the important distinction is between a flowing yolk and an unset white. You can prefer the former without wanting the latter. Look especially at the thicker white immediately surrounding the yolk.
Jammy is harder to judge without cutting into the egg. If you're learning that finish, accept that the first egg may be a test of your particular setup rather than a perfectly repeatable result.
A timer tells you when to inspect the egg. Your chosen endpoint tells you whether to keep cooking.
These estimates assume the baseline method. Don't compensate for a different pan by blindly adding time while the underside becomes darker.
Adjusting the Same Method for Pan Type and Egg Age
Two eggs can spend the same time on the stove and still look quite different. Before changing your entire method, identify whether the difference came from the pan's behaviour or the egg itself.
Use the comparison below as a prompt to observe your cookware, not as a guaranteed ranking of which material cooks fastest.
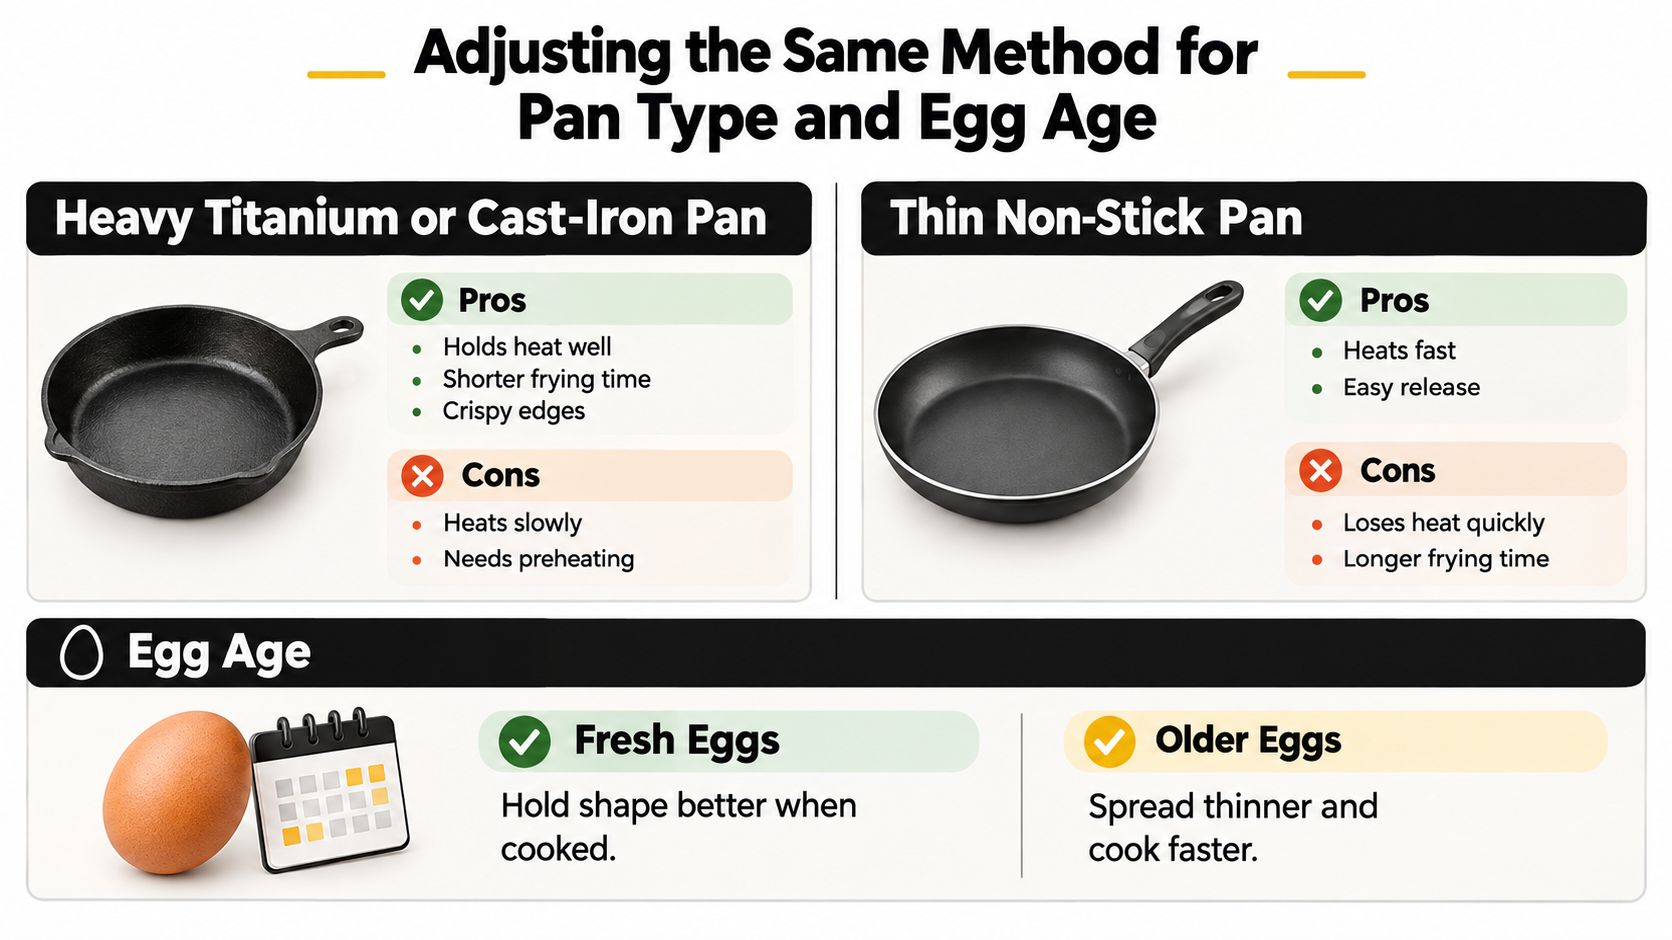
Adjust to the pan in front of you
Don't assign a universal time correction to titanium, cast iron, stainless steel, or non-stick cookware. Instead, notice whether your particular pan keeps browning the egg after you lower the burner. If it does, reduce the heat earlier on your next attempt.
Likewise, don't assume a thin pan needs a longer fry just because it's thin. Burner output, preheating, and the pan's construction all matter. A guide to non-stick frying pans with lids can help you consider the practical pairing of cooking surface and cover.
Adapt to the egg's condition
CSIRO's explanation of egg quality notes that older eggs spread more because their contents become runnier, and that the yolk-supporting membrane is more likely to split in very old eggs. That makes freshness relevant when you want a compact shape and an intact yolk.
- For a neater egg: Choose a fresher egg when possible, rather than trying to corral a widely spread white with the spatula.
- For easier inspection: Crack the egg into a small bowl first so you can spot shell fragments and transfer it gently. Appearance alone isn't proof of safety.
- For a cold egg: Allow the white to reach its endpoint instead of increasing the burner to force a familiar finishing time.
For storage organisation, Pure Grubs' guide to the best ways to store fresh eggs offers further reading. Keep Australian refrigeration and handling guidance as your safety reference.
Watch the handling and movement in the pan alongside your own observations.
A lid can help you manage an unset upper white. It isn't evidence that the centre has reached a safe temperature.
Australian Food Safety and Egg Doneness
Culinary doneness and microbiological safety answer different questions. One concerns the texture you enjoy; the other concerns whether cooking has adequately addressed foodborne-illness risk. A pleasing appearance doesn't settle both.
Healthdirect Australia's food-safety guidance recommends cooking fried eggs until both the white and yolk are firm, with a target internal temperature of 72°C. Its guidance is especially important for children, pregnant people, older adults, and people with weakened immune systems.
The visual below introduces the temperature distinction. Treat the public-health guidance, not a colour, texture label, or short cooking-time range, as the safety reference.
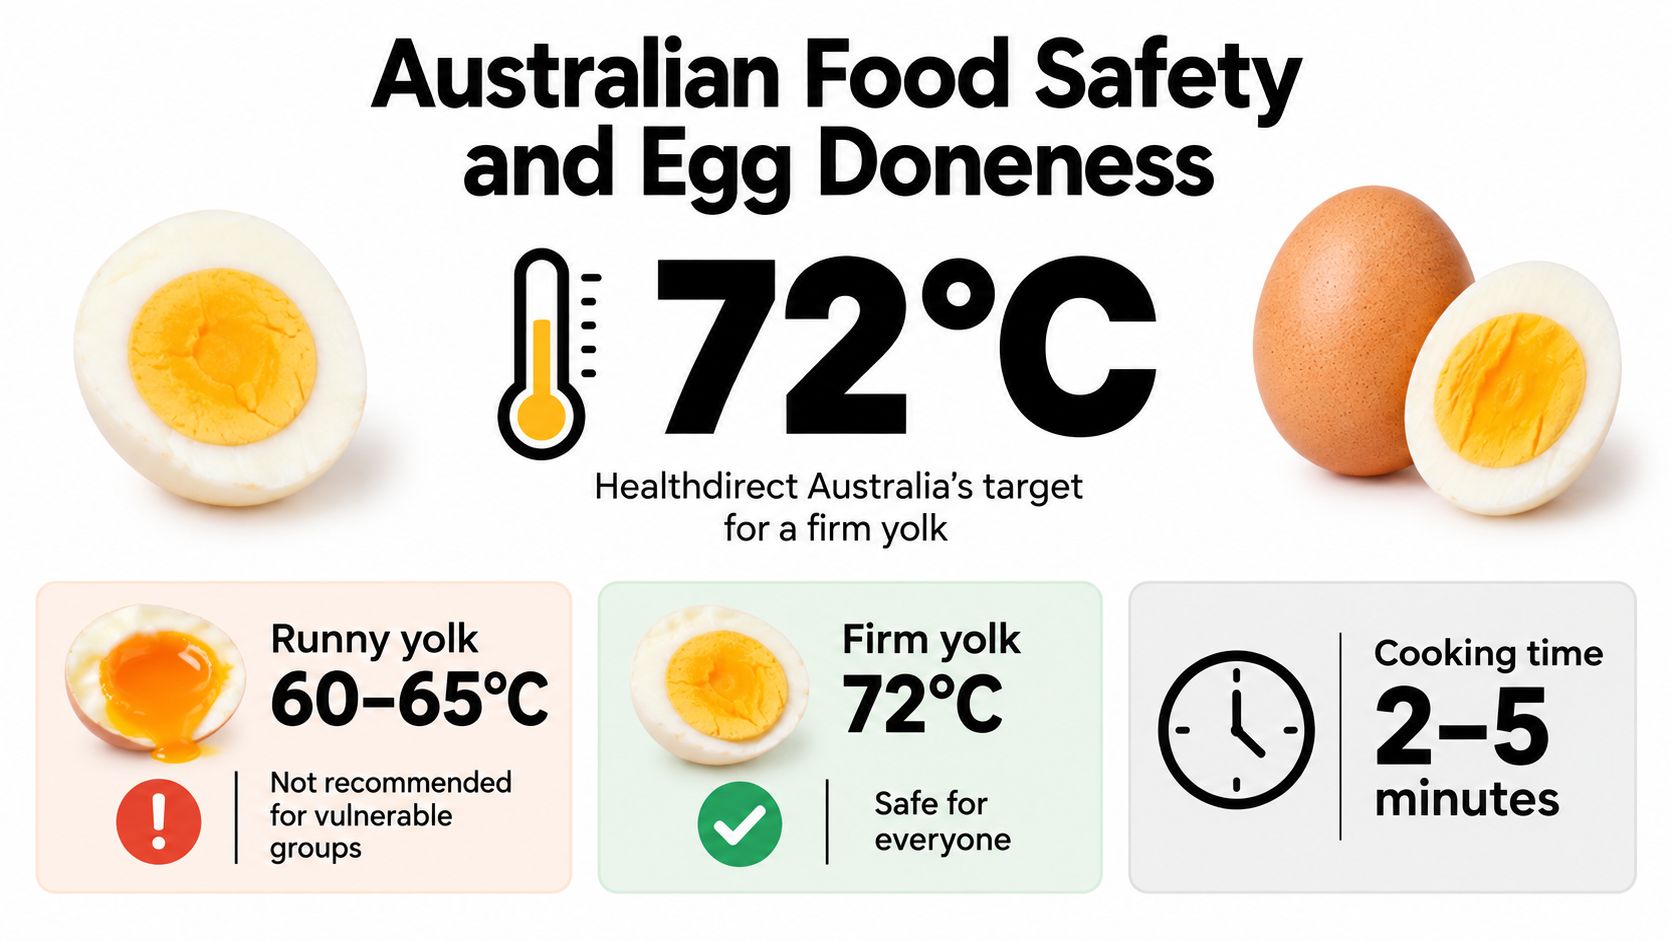
Why commercial egg benchmarks aren't home-frying instructions
Food Standards Australia New Zealand's egg-safety appendix identifies raw and lightly cooked eggs as high-risk foods associated with Australian outbreaks, particularly involving Salmonella. It also specifies controlled egg-product processes, including 64°C for 2.5 minutes for whole egg pulp.
That benchmark combines a defined product, temperature, and holding time. You can't transfer it directly to an intact egg in a household frying pan, where the underside, upper white, and yolk aren't necessarily heating evenly.
A food thermometer can help verify the centre temperature, although inserting a probe into a thin fried egg without breaking it is awkward. For vulnerable diners, choose the fully cooked endpoint rather than interpreting a runny yolk as sufficiently treated.
Keep handling separate from texture preferences
- Wash your hands: Do this before and after handling eggs to reduce cross-contamination.
- Reject damaged eggs: Discard cracked eggs rather than trying to make them acceptable through extra frying.
- Keep eggs cold: Store them refrigerated until use.
- Prepare a clean workspace: Keep raw-egg contact away from ready-to-eat food and serving utensils.
These habits complement broader food preparation safety practices. They don't turn a lightly cooked egg into a fully cooked one.
Safety distinction: A runny yolk is a texture preference, not evidence of a validated cooking process. For higher-risk diners, serve the white and yolk firm.
Troubleshooting the Most Common Fried Egg Problems
When an egg starts going wrong, resist changing everything at once. Identify the problem, make a controlled adjustment, and watch what happens. That's more useful than increasing the heat because the timer is nearly finished.
Diagnose what you can see
-
The white spreads into a wide, lacy shape.
A runnier, older white may be contributing to the spread, while strong heat can exaggerate the crisp edge. For a compact result next time, choose a fresher egg and use the baseline heating method. -
The yolk breaks during the flip.
The egg may lack support, or the yolk may be fragile. Slide the spatula well underneath and make a gentle turn rather than lifting from the edge; if presentation matters more than flipping, choose a covered finish. -
The base browns before the upper white sets.
Don't use the colour underneath as your finishing signal. Reduce the burner and cover the pan so you can continue cooking without pushing the base harder. -
The white seems tough but the yolk remains soft.
Cooking longer at the same aggressive setting isn't a useful correction. Lower the heat and reassess whether you need a lid or a different finish. -
Oil spits across the hob.
Turn the heat down, as the baseline method advises. Don't lean over the pan or rush to flip the egg while it's spitting.
When the egg sticks
Stop pulling at it. Work the spatula gently around the set edge, then underneath, keeping the egg supported. If the white tears, you can still finish cooking it properly; a broken outline doesn't mean breakfast has failed.
For your next attempt, check your preheating and oil coverage before changing the cooking duration. A stuck egg isn't automatically an egg that needed a longer timer.
Visual cues help you manage texture. A thermometer and the recommended cooking endpoint address safety more directly than a fixed clock.
A Simple Decision Flow for Your Next Egg
Make the important choice before the egg reaches the pan: who's eating, and what finish suits them? If you're cooking for someone at higher risk from foodborne illness, choose the firm endpoint from the start. That avoids trying to rescue an unsuitable breakfast at serving time.
For a repeatable routine, keep this sequence beside the stove:
- Choose the finish. Decide whether you want a flowing, thickened, or firm yolk, with safety taking priority over preference where needed.
- Prepare the setup. Have the oil, spatula, lid, and plate ready before cracking the egg.
- Use the baseline. Start with the familiar method rather than combining several different recipe techniques.
- Read the response. Check the upper white and underside, then decide whether to lower the heat, cover, or turn.
- Confirm the endpoint. Don't plate the egg just because the timer has sounded.
Build confidence through small adjustments
After breakfast, remember the adjustment that mattered. Perhaps your usual burner needed lowering earlier, or covering gave you the finish you wanted without a flip. Repeat that useful change before introducing another variable.
You don't need a flawless-looking egg to become a capable cook. You need a method you understand and a clear distinction between a cosmetic disappointment, such as a broken yolk, and an incomplete cooking endpoint.
If frying doesn't suit your preferred breakfast routine, a guide to choosing an egg poacher offers another preparation option. Changing the tool still means paying attention to doneness and handling.
Choose cookware with clear material information, suitable utensils, and care instructions you can follow. Pure titanium may be part of your kitchen preferences, but no surface material replaces clean handling or adequate cooking.
Everti offers titanium essentials for the kitchen and table, including cookware and preparation tools. Visit Everti to explore options for your breakfast setup, and pair your choice with the controlled heat and careful doneness checks you've practised here.