
So, what exactly is a poached egg pan? It's a clever piece of cookware designed specifically to take the pain out of poaching. It features individual cups that hang just above a base of simmering water, taking all the guesswork out of the process. This setup ensures you get perfectly shaped, consistently cooked eggs every single time, without those frustrating, stringy whites. It’s the secret weapon for getting cafe-quality results with almost no effort.
The Simple Solution to a Tricky Technique
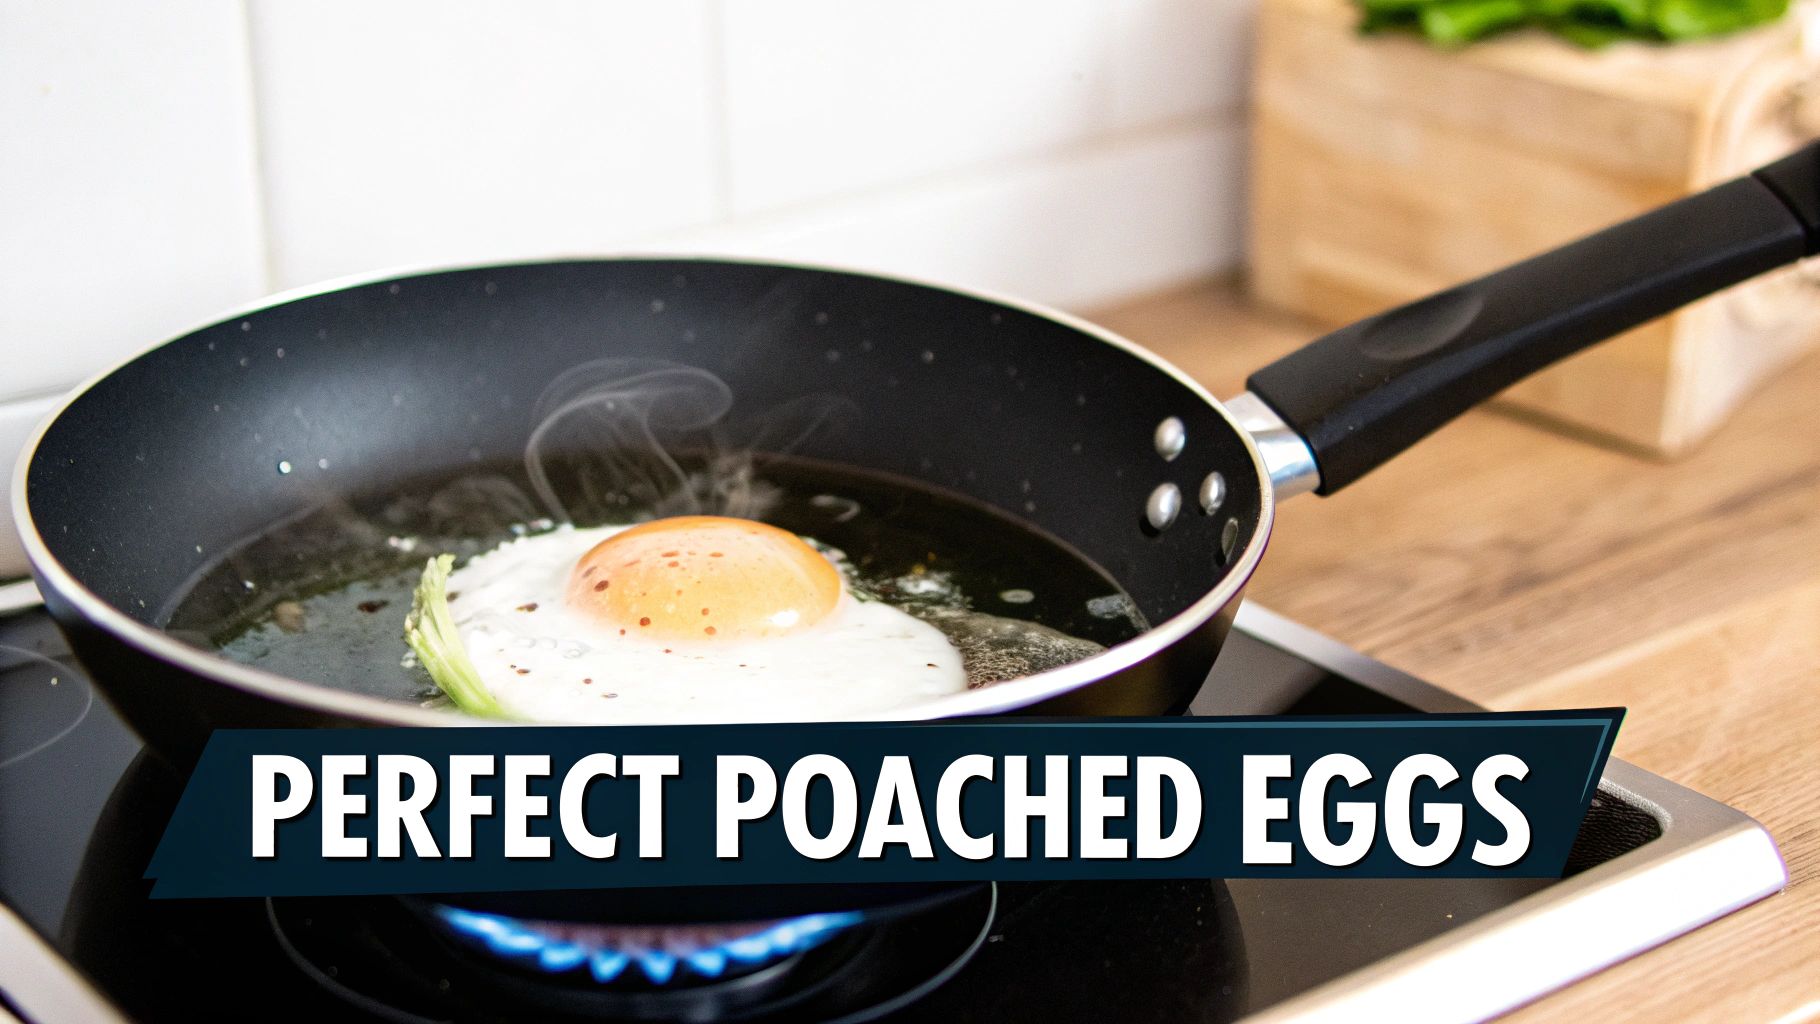
Let's be honest, poaching an egg the old-fashioned way can feel like a bit of a gamble. You carefully create a swirling vortex in a pot of water, add a splash of vinegar, and hope for the best. More often than not, you end up with wispy, separated whites and, if you're really unlucky, a broken yolk. It’s a technique that demands patience, practice, and a healthy dose of luck.
This is where a poached egg pan completely changes the game. Think of it as a foolproof guide for what is otherwise a delicate task. Instead of dropping an egg into open water and crossing your fingers, you simply crack it into a secure, lightly greased cup. That small difference makes all the difference.
The pan's magic lies in its design, which uses gentle steam from the simmering water below to cook the eggs. This indirect heat is the key to achieving that tender, delicate texture that boiling water just can't match.
Consistency and Convenience Combined
The biggest advantage of using one of these pans is the sheer consistency you get. Because every egg is cooked under the exact same conditions, they all come out with a uniform shape, size, and level of doneness. This reliability turns a once-difficult skill into a simple, repeatable part of your morning routine.
This kind of convenience is a big deal in Australia, where eggs are a true kitchen staple. In the 2023-24 financial year alone, the Australian egg industry produced a staggering 6.98 billion eggs. As more of us choose premium, free-range eggs, it makes sense to have reliable tools like a poached egg pan to make sure those quality ingredients are cooked to perfection. You can learn more about the scale of the Australian egg industry and consumer trends in this detailed overview.
Ultimately, this simple tool brings a few key benefits to your kitchen:
- Effortless Perfection: It gets rid of the need for any tricky swirling techniques or adding vinegar to the water.
- Healthier Cooking: Poaching is a naturally low-fat way to cook, with no need for the oils used in frying.
- Minimal Fuss and Mess: The self-contained cups mean the whole process is cleaner, from cooking to washing up.
When it comes to picking a poached egg pan, there isn't one single "best" choice for everyone. It really boils down to your own cooking habits, how much space you've got in your kitchen, and whether you prefer a hands-on approach or a set-and-forget solution. Getting to know the main types out there is the first step to finding the perfect tool for your morning eggs.
The big three are the classic stovetop pans, the super-convenient electric models, and the lightning-fast microwave poachers. Each one works a bit differently, offering its own unique mix of precision, ease, and speed.
The Classic Stovetop Poached Egg Pan
You can think of a stovetop poacher as the 'manual transmission' of the egg world. It puts you in the driver's seat, giving you complete control over the heat and timing. This lets you make tiny adjustments to get that yolk just right—whether you like it runny, jammy, or firm. These pans typically have a shallow base for water, an insert with individual non-stick cups, and a lid to keep the steam in.
The process is simple: you add a bit of water to the base pan, let it come to a gentle simmer on the stove, and then place the insert with your cracked eggs into the pan. The real magic is in the steam, which gently cooks the eggs from every angle for that perfect, delicate texture that's so hard to get right in a pot of swirling water.
These pans are a brilliant option for anyone who genuinely enjoys the art of cooking and wants that fine-tuned control. Plus, they’re often quite versatile; take out the insert, and you've got a handy little frying pan or saucepan ready to go.
The Convenient Electric Poacher
If the stovetop pan is the manual, then the electric poacher is the automatic. It's a countertop appliance designed to do one thing and do it perfectly, with almost zero effort from you. Just add water to the marked line, pop your eggs in the trays, put the lid on, and push a button.
Most electric models even have an automatic shut-off, so the machine turns itself off when the water has steamed away and the eggs are done. This kind of "set it and forget it" convenience is a lifesaver on hectic mornings or for anyone who’s a bit nervous about getting the temperature right on the hob.
This flowchart really sums up the choice between the tricky, traditional way and the simple path a poacher offers.
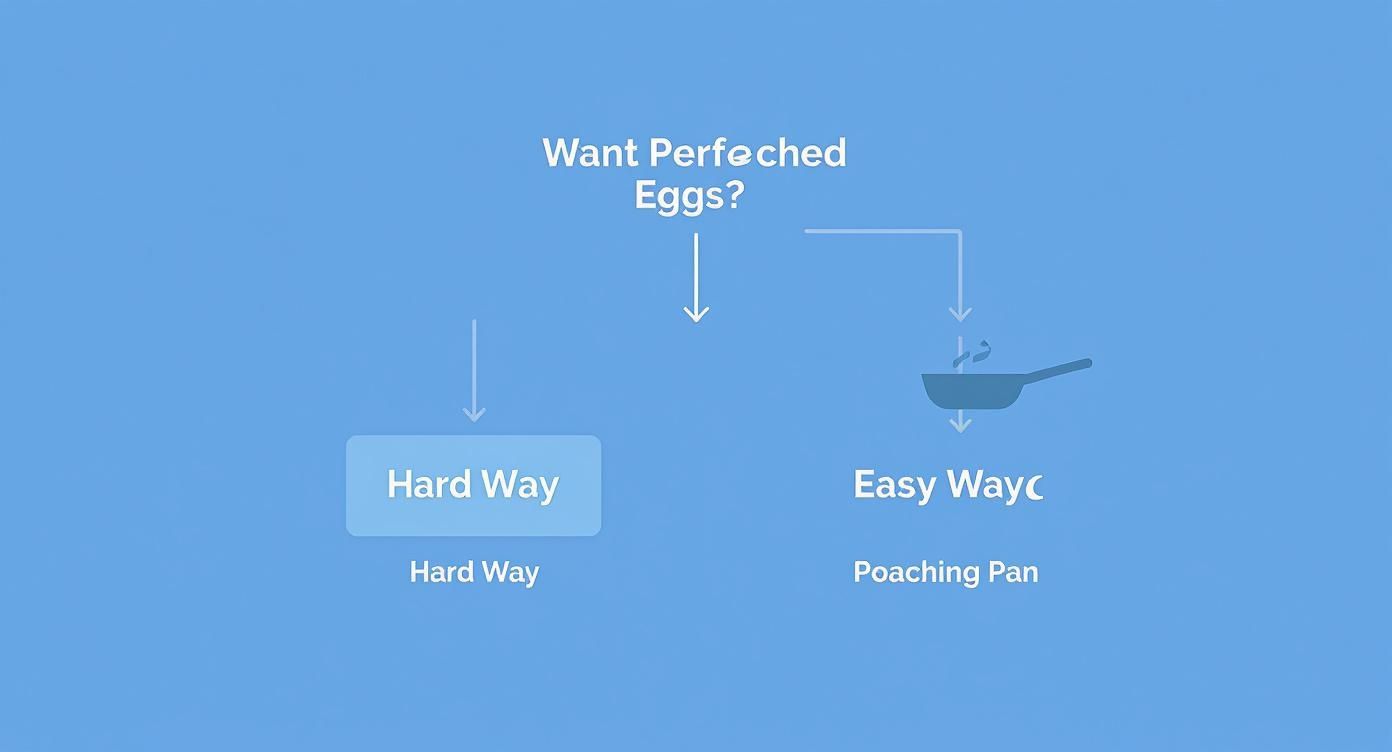
As you can see, while the old-school whirlpool method has its charm, a dedicated poacher is your reliable shortcut to consistently great results.
Speedy Microwave Models
Microwave egg poachers are built for one thing: getting the job done fast. They're usually small plastic or silicone containers, designed to cook 1 or 2 eggs in just a minute or so. All you do is add a little water, crack an egg into the cup, snap on the lid, and pop it in the microwave.
It's worth noting that while they are without a doubt the fastest way to a poached egg, the final result can be a little different. The texture might be a bit firmer compared to stovetop or electric methods. But for a healthy breakfast in a hurry, you really can't beat their convenience.
Comparing Poached Egg Pan Styles
To make the choice even clearer, let's break down how these different styles stack up against each other.
| Pan Type | Best For | Pros | Cons |
|---|---|---|---|
| Stovetop | Home cooks who want precise control and multi-purpose cookware. | • Full control over heat and time • Pan can be used for other tasks • Excellent texture and taste |
• Requires monitoring • Takes up hob space |
| Electric | Busy individuals or families wanting consistent, hands-off results. | • Set-it-and-forget-it convenience • Automatic shut-off • Very consistent results |
• Single-purpose appliance • Takes up counter space |
| Microwave | Anyone needing a super-fast breakfast for one or two people. | • Extremely fast (1-2 minutes) • Easy to clean and store • Very affordable |
• Texture can be firmer • Less control over doneness |
Ultimately, picking the right pan comes down to what you value most in the kitchen—be it control, convenience, or pure speed. For a more detailed look at specific models and features, our guide on choosing the best egg poacher offers more tips to help you find the perfect match. No matter which you choose, any of these pans will set you on the path to mastering this classic breakfast dish.
Choosing the Right Pan Material
Think of your pan's material as the foundation of a house. It dictates not just how well it cooks, but how safe it is and how long it will stick around in your kitchen. Choosing the right one is a balancing act between heat performance, how easy it is to clean, and long-term value. Let's walk through the most common materials to find the perfect fit for you.
Every material plays with heat a little differently, and that directly impacts how your eggs turn out. Some heat up in a flash and spread it evenly, while others can create sneaky hot spots that leave you with one overcooked egg and one undercooked. Getting this right is the secret to that perfect, delicate white and gloriously runny yolk.
Stainless Steel: A Durable Classic
There's a reason stainless steel is such a kitchen staple. It's tough as nails, shrugs off rust and corrosion, and doesn't react with acidic ingredients like a dash of vinegar in your poaching water. A well-made stainless steel pan can genuinely last a lifetime if you look after it.
The catch? On its own, stainless steel isn't the greatest at conducting heat, which can lead to that uneven cooking we talked about. High-quality pans get around this by sandwiching a core of aluminium or copper between layers of steel. This clever construction gives you the best of both worlds: the durability of steel with the fantastic heat distribution of the core material.
Non-Stick and Silicone: Convenience First
If your top priority is a cleanup so fast you'll blink and miss it, then non-stick coatings and silicone cups are hard to beat. A quick wipe is usually all it takes, and the eggs just slide right out with little to no butter or oil needed. Silicone is particularly user-friendly—it’s flexible and stays cool, making it a breeze to handle.
The main thing to keep in mind with traditional non-stick is its lifespan and the chemicals used in the coatings. Over time, these surfaces can get scratched or start to break down, especially if you accidentally use metal utensils. This is why it pays to understand what the coating is made of, as not all non-stick is created equal. You can dive deeper in our guide to finding the best non-stick surface for a frying pan to learn about the latest options.
You're often looking at a trade-off. The sheer convenience of non-stick is undeniable, but many home cooks now prefer to sidestep synthetic coatings, which leads them to naturally non-stick and completely inert materials.
Titanium: The Modern Standard
This is where titanium really changes the game. It’s an incredible material—exceptionally strong yet surprisingly lightweight. It's also completely non-reactive, so you never have to worry about it leaving a metallic taste in your food.
But the real magic is that pure titanium is naturally non-porous. This creates a hygienic surface that resists sticking without needing any chemical coatings.
A titanium poached egg pan is a brilliant investment for anyone who's health-conscious. You get fantastic food release without any concerns about PFCs, PFAs, or other synthetic compounds. Its natural durability also means it’s not going to warp, scratch, or rust, even after years of Sunday brunches.
It’s clear that people are looking for better, healthier cookware. In 2023-24, the Australian market saw a huge jump in demand for poacher pans made from titanium, silicone, and stainless steel. It’s all part of a bigger shift towards enjoying quality, home-cooked meals.
How to Use Your Poached Egg Pan: A Step-by-Step Guide
Getting the hang of a stovetop poached egg pan turns a notoriously fussy breakfast staple into something wonderfully simple. I'll walk you through the process step-by-step, so you can nail that perfectly shaped, beautifully cooked egg on your very first go. Think of it less as a complex culinary skill and more as just following an easy recipe.
A Little Prep Goes a Long Way
Before you even think about turning on the heat, a couple of quick prep steps will set you up for success. This literally takes less than a minute but makes all the difference when it's time to get the eggs out of the pan.
- Get the Water Right: Pour about 1-2 cm of water into the base of the pan. You're aiming for just enough to create a nice, consistent steam without the water boiling up and touching the bottom of the egg cups.
- Grease the Cups: Give the inside of each egg cup a light coating of butter, coconut oil, or a quick spritz of cooking spray. Yes, even the best non-stick surfaces appreciate this little bit of help—it's your guarantee that the eggs will slide right out.
The Cooking Process
With your pan prepped and ready, it's time to get cooking. The magic of these pans is the gentle steam, which gives poached eggs that signature delicate texture. A gentle simmer is your friend here; a raging boil is not.
Step 1: Bring the Water to a Simmer Pop the pan on your stovetop over medium heat. You want to see small, gentle bubbles breaking the surface, not a full-on rolling boil.
Step 2: Crack Your Eggs Once the water is simmering away, lower the insert (with the greased cups) into the pan. Now, carefully crack one fresh egg into each cup. Fresher eggs tend to hold their shape much better, giving you a cleaner result.
Step 3: Cover and Let the Steam Work Its Magic Put the lid on your poached egg pan. This traps all that lovely steam, which is what cooks the eggs so gently and evenly from every direction.
The real secret to getting the timing right isn't just watching the clock—it's watching the egg whites. When the whites look fully opaque and feel firm to a gentle touch, your eggs are done. The yolk's consistency is then just a matter of how long you let them steam.
Nailing Your Perfect Yolk
Everyone has their preference for the perfect yolk, from completely runny to firm. The good news is, you're in complete control.
Here’s a rough guide to get you started:
- For Runny Yolks: Let them steam for about 3-4 minutes. This will set the whites perfectly while leaving you with a glorious, liquid gold centre that’s ready to burst.
- For Jammy Yolks: Aim for 4-5 minutes. This is my personal favourite—a soft, creamy, and slightly gooey yolk that’s not entirely liquid.
- For Firm Yolks: Give it 5-6 minutes. At this point, the yolk will be cooked through, much like a hard-boiled egg.
When they’re cooked just how you like them, carefully lift the insert out of the pan. A small silicone spatula or even a spoon is perfect for gently sliding each egg out of its cup and onto your toast. And there you have it—a flawless, delicious poached egg, every single time.
Extending Your Pan’s Lifespan with Proper Care
A high-quality poached egg pan is a genuine kitchen investment. Look after it properly, and it’ll reward you with perfect breakfasts for years and years. Protecting that investment isn’t complicated—it just requires a few good habits that start the moment you finish cooking.
First things first: always let your pan cool down naturally. It can be tempting to plunge a hot pan straight into a sink of cold water, but this causes thermal shock. That sudden temperature drop can warp the metal and ruin the non-stick surface over time. Just leave it on the cool stovetop for a few minutes before you touch it.
When it's time to clean, remember that gentle is always better. For any non-stick or titanium surface, steer clear of abrasive scourers, steel wool, and harsh chemical detergents. These will only create tiny scratches that compromise the coating, leading to food sticking down the track. A soft sponge with a bit of warm, soapy water is all it takes to get it spotless.
Hand Washing vs Dishwasher Use
Even if a pan says it’s dishwasher-safe, hand washing is almost always the smarter move for longevity. The combination of high heat and aggressive detergents in a dishwasher can be pretty tough on non-stick coatings and can even dull the shine on stainless steel.
Think of hand washing as a small act of preservation. It takes only a minute but can add years to the life of your cookware, especially a specialised tool like your poached egg pan.
If you’re curious about the nitty-gritty, knowing what makes some cookware tough enough for the machine is helpful. We break it down further in our guide to truly dishwasher-safe pans.
While we're on the topic of cookware care, understanding specific care techniques like seasoning cast iron can be incredibly useful for all sorts of pans in your kitchen, not just the one for poaching eggs.
The final piece of the puzzle is how you store it. Try to avoid stacking heavy pots and pans directly on top of the non-stick surface. If you’re tight on space and have to stack, just place a soft cloth, a pan protector, or even a paper towel inside. This simple barrier will prevent any accidental scratches and dings.
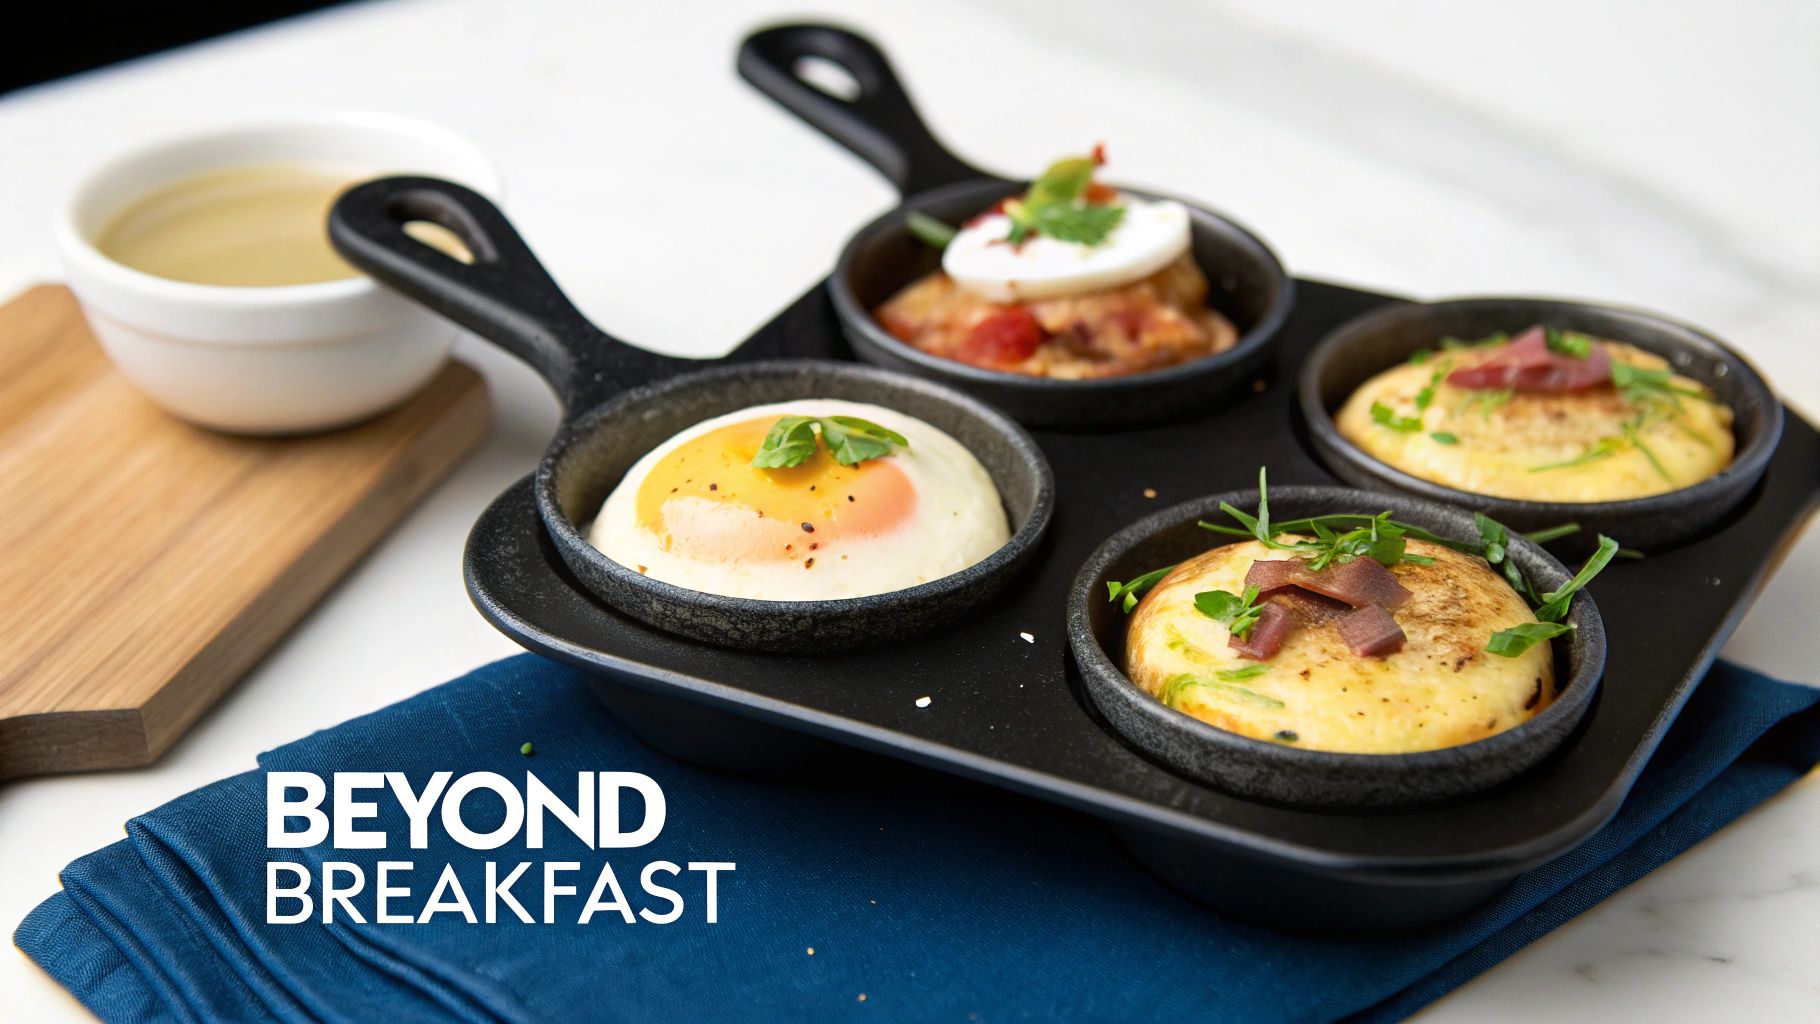
Creative Recipes Beyond Breakfast
Don't let the name fool you. That poached egg pan sitting in your cupboard is one of the most underrated, versatile tools you own. Think of it less as a one-trick pony for breakfast and more as a secret weapon for creating perfectly portioned dishes for any meal of the day.
Once you start seeing the individual cups as mini moulds for steaming or baking, a whole new world of culinary ideas opens up. It’s a game-changer.
This kind of versatility is exactly why specialised cookware is making such a comeback. The Australian kitchenware market, already valued at around USD 3.85 billion in 2024, is tipped to keep growing as more of us look for tools that help us cook healthier and more interesting food at home. It really shows the demand for clever, multifunctional items like a good poached egg pan. You can read more about the growth of Australia's kitchenware market if you're curious.
Savoury and Sweet Ideas
Ready to have some fun? The pan’s gentle, controlled steaming is perfect for all sorts of delicate recipes that need a soft touch.
Here are a few simple ideas to get your creative juices flowing:
- Mini Frittatas: Whisk up some eggs with your favourite fillings—think spinach, feta, and finely chopped capsicum. Pour the mixture into the greased cups and steam until they're perfectly set. You've just made flawless, bite-sized appetisers.
- Individual Savoury Custards: For an elegant starter, try steaming a simple mix of egg, cream, and fresh herbs like chives or dill. These delicate little custards are beautiful served alongside a simple green salad.
- Delicate Steamed Puddings: Yes, even dessert! Use the pan to make small, light-as-air sponge puddings. Serve them warm straight from the pan with a drizzle of caramel sauce or a simple dusting of icing sugar.
The real magic here is the built-in portion control and presentation. The pan’s cups guarantee every single serving is uniform and beautifully shaped, so you can turn out impressive-looking dishes with barely any effort.
Once you’ve got a feel for these techniques, you can start branching out even further. A little knowledge on topics like how to cook with olive oil can help you add another layer of flavour to your frittatas and custards. Before you know it, your single-use gadget will become an essential tool for appetisers, entrées, and even desserts.
Common Questions About Poached Egg Pans
Even with a tool as simple as a poached egg pan, a few questions always seem to pop up. Let's clear the air on some of the most common ones so you can get straight to cooking with confidence.
Do I Need to Put Vinegar in the Water?
Nope, you can leave the vinegar in the cupboard. That trick is really for when you're poaching eggs the old-fashioned way, directly in a pot of water. The vinegar helps the egg whites firm up quickly so they don't turn into a stringy mess.
But with a poached egg pan, the cups do all the hard work for you by holding the egg in that perfect shape. So, not only is vinegar unnecessary, but leaving it out means you get the pure, clean flavour of the egg without any vinegary aftertaste.
Is Greasing the Cups Really Necessary?
Yes, absolutely. Don't skip this step! It might seem redundant with a good non-stick pan, but a tiny bit of butter or oil is your best friend here.
Think of it as an insurance policy. That light coating guarantees your beautifully cooked eggs will slip right out without any sticking or tearing. It keeps their shape flawless and makes cleanup almost laughably easy, which is exactly what you want on a busy morning.
The goal is a seamless cooking experience, from pan to plate. A quick swipe of grease is the secret to preventing a broken yolk and a frustrating cleanup.
How Can I Tell When My Eggs Are Done?
You're looking for a cooking time of around 3-5 minutes, but your eyes are the best judge. The key is to watch the whites—they should be firm and completely opaque. If you see any jiggly, translucent spots, they need a little more time.
For that perfect, runny yolk, give the pan a gentle shake. The yolk should have a distinct wobble. You can also give the top of the yolk a very light poke with your finger; it should feel soft and springy. Once you get the hang of these visual cues, you'll nail the perfect poach every single time.
Ready to achieve flawless poached eggs with unmatched ease and hygiene? Explore the lifetime durability and pure, non-toxic performance of the titanium cookware collection from Everti and elevate your breakfast routine. Discover the difference at https://everti.com.au.