

You've bought a tray that looked right online, but it won't slide past the rear fan guard. Turn it sideways and it fits, just, with the rim almost touching the oven wall. That's not a useful fit. Choosing small oven trays means checking the space available for hot air, food and safe handling, not just whether the door closes.
Why a Small Oven Tray Is Not Just a Smaller Tray
Say you're replacing the battered tray that came with a benchtop oven. The replacement has the same advertised cooking surface, but broader handles and a deeper rim. Suddenly, you can't pull it out level without catching the shelf above.
The problem is external dimensions, not cooking area. Handles, rolled edges and sloping sides all take up room that an online product photograph can hide.
Ovenware also needs to survive routine use. A 2025 Australian estimate published by Eco Voice reported that 69% of Australians owned an electric oven, with electric-oven households using theirs for an average of 2 hours and 15 minutes per week. For a regularly used tray, that means repeated heating, cooling, food contact and washing.
Practical rule: A tray is a guest in the oven's airflow. It shouldn't occupy every available bit of space.
This distinction matters most in compact appliances. A tray can slide onto the rack yet leave too little room around its edges for consistent cooking. A deeper replacement can also bring food closer to an exposed element, even when its footprint seems suitable.
Check the complete tray, including its rim and handles, before deciding it belongs in your oven.
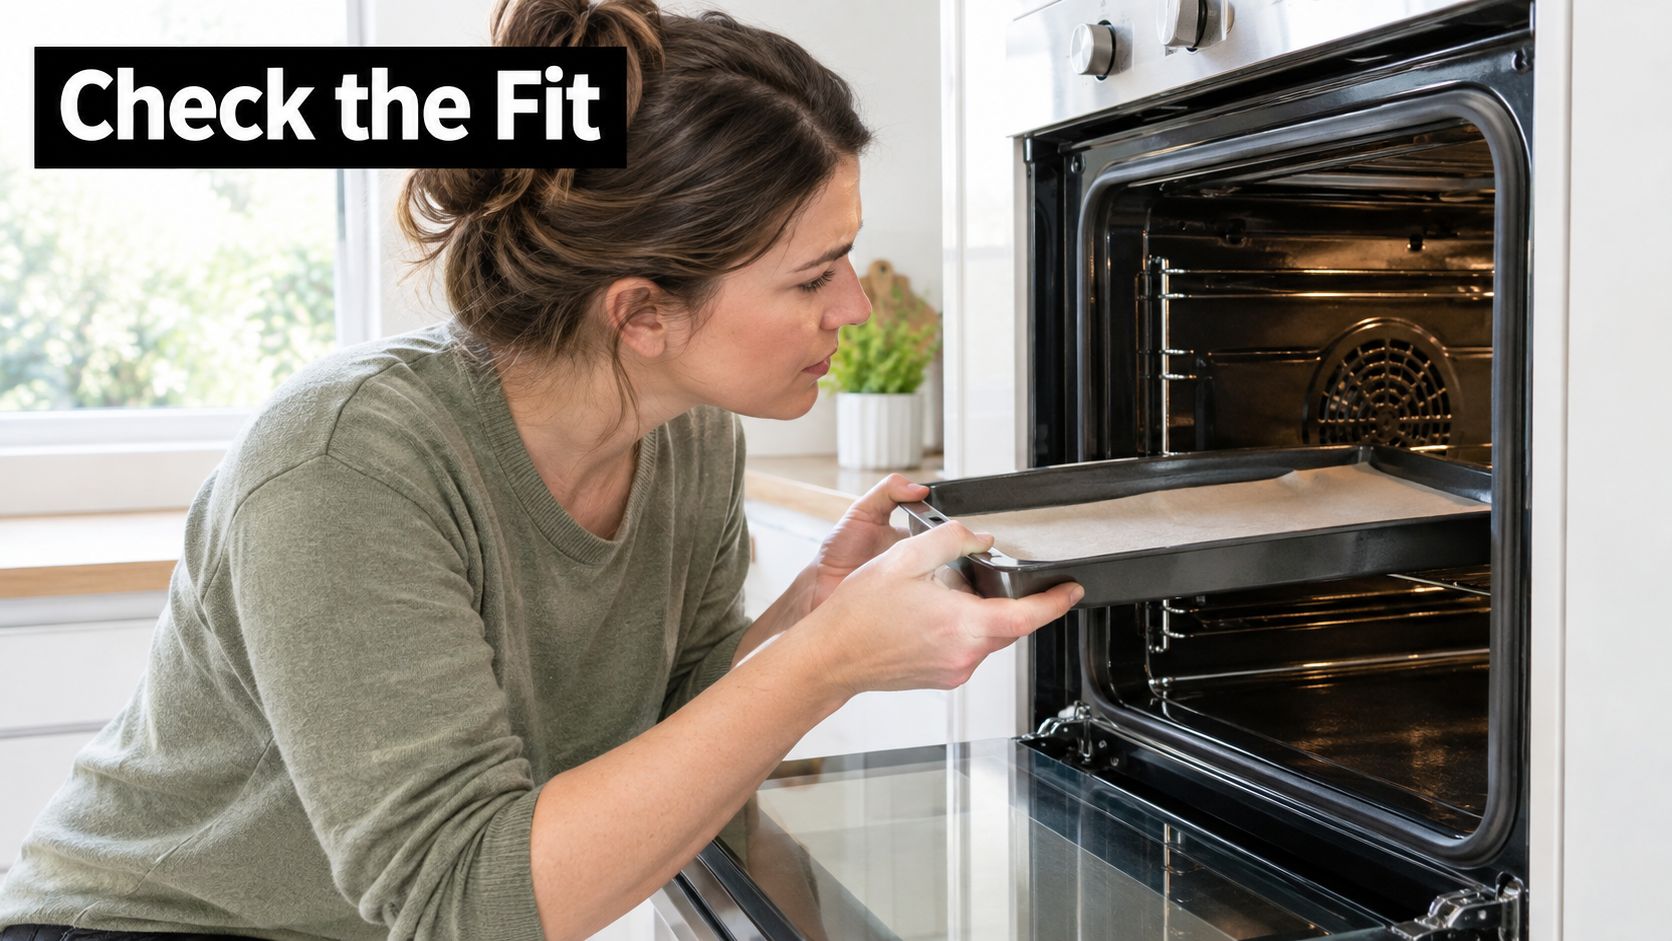
For renters, apartment cooks, caravan owners and benchtop-oven users, the right purchase starts with the appliance rather than the accessory aisle. Usable shelf space, normal portions, material and temperature rating should determine the choice. A compact tray should make dinner easier without adding awkward handling, extra batches or another surface that's difficult to clean.
Measure Your Oven Before You Buy a Tray
A tray can be smaller than the oven cavity and still be the wrong tray. Manufacturers publish a maximum tray size that sits well inside the walls, because the fan and elements need a clear circulation path around it. The number that decides the purchase is the permitted tray size in your manual, not the open space a tape measure finds.
Oven cavity and maximum tray size reference
| Oven type | Internal cavity (H × W × D) | Maximum tray size | Key constraint |
|---|---|---|---|
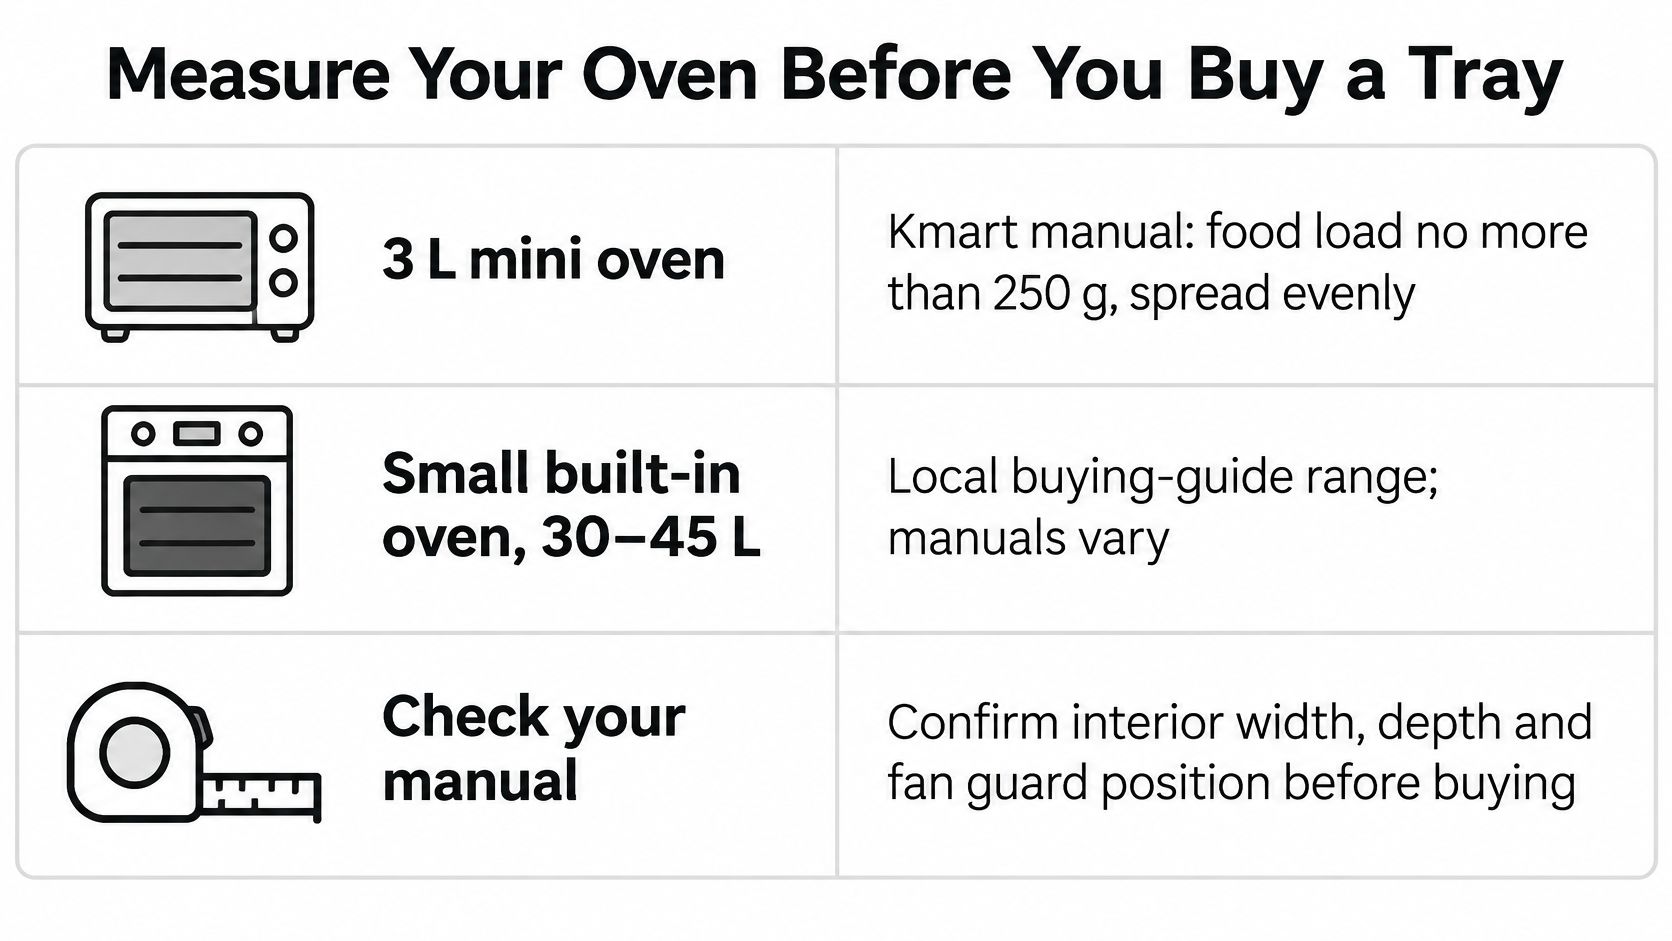
| 3 L mini oven | Measure the supplied rack and the clearance to each element | Use only the tray supplied or specified for the appliance | Spread food in an even layer; small cavities overload quickly |
| Small built-in oven, roughly 30–45 L | Measure between the shelf supports, then shelf front to rear fan guard | Sized below the usable shelf space, with clearance kept around the edges | Capacity in litres doesn't establish tray compatibility on its own |
| Electrolux Australia representative oven | 335 × 395 × 400 mm | 300 × 350 mm | Larger trays restrict heated-air circulation |
| Fan-forced built-in oven | Measure usable shelf space and the clearance behind it | Sized within the usable shelf depth, rear guard included | Keep trays off the oven base |
| Compact oven with top and bottom elements | Measure between the rails and around both elements | Sized to clear both elements with the door fully closed | Rims and handles count toward the limit |
These are model-specific references, not interchangeable specifications. The Electrolux Australia instruction manual gives its representative cavity as 335 × 395 × 400 mm and limits baking trays to 30 × 35 cm because larger trays restrict heated-air circulation.
The gap between cavity size and permitted tray size is deliberate. Oven walls define the enclosure; rails, the fan housing and the required circulation path determine what you can use. I'd treat the manual's stated tray size as a hard ceiling and shop a size under it rather than right at it.
Keep a measurement checklist beside you while checking the appliance.
Measure at the shelf, not the door
Switch the oven off and let it cool completely. Use a tape measure, a straightedge and a notepad rather than estimating from the original tray.
- Measure usable width at shelf height. Measure between the obstructions the tray must pass, including projecting shelf supports. Don't measure wall to wall and assume that space is usable.
- Measure usable depth. Check from the front limit of the shelf to the rear fan guard or other projection. Account for the door closing without pressing against a handle.
- Check vertical clearance. Include the tray's rim, handles and the food you'll cook. A tray that fits empty may be unsuitable once loaded.
- Allow circulation around the perimeter. Follow the appliance manual's clearance instructions. Don't invent a universal gap that might be wrong for your model.
- Confirm the manufacturer's tray limit. This overrides a retailer's description of standard, compact or mini.
Read the product dimensions carefully
Ask whether a listing gives overall dimensions or internal cooking dimensions. A broad rolled rim can make these noticeably different. For roasting, also check whether the stated depth includes the handles or just the pan wall.
A cardboard template cut to the listed footprint can confirm the outline in a cold oven, including whether the handles clear the door. Remove it immediately afterwards, and never switch the appliance on with the template inside.
Use this video as an additional visual reference while checking your setup.
A tray accepted by one compact oven can obstruct another with a different fan housing or rail arrangement. Matching the advertised footprint isn't proof of compatibility; the manual's stated limit is.
Matching Tray Size to Servings and Batches
Buying a smaller tray can help you cook the amount you intend to eat. It won't help if you pile the same large meal onto less surface area and then wonder why the vegetables are wet.
The smallest tray isn't automatically the most efficient. A cramped load releases moisture into a restricted space, while an undersized tray may force you to run successive batches. Neither outcome makes the purchase especially useful.
Westinghouse's air-fry oven guidance recommends avoiding crowding and arranging food in a single layer. That's a useful capacity test for roasting too, although the spacing needed changes with the food and the result you want.
Tray size by household scenario
The dimensions below are hypothetical shopping starting points, not tested portion capacities. Your appliance's documented tray limit governs every choice.
| Household scenario | Starting tray size | Batch approach | Watch for |
|---|---|---|---|
| Solo meal | For example, around 200 × 300 mm | Aim for a single-layer batch | A small portion can still be crowded |
| Couple | For example, around 250 × 300 mm | Check that both portions fit without overlap | Handles and rims reduce usable space |
| Children's portions | For example, around 200 × 300 mm | Split into smaller batches when necessary | Overloading reduces browning |
| Meal prep for the week | Largest useful surface within the stated limit | Divide the prepared food into consistent loads | Different cuts may need separate cooking |
| Leftovers and reheats | Small tray that holds the food without stacking | Reheat only the portion required | Both tray and liner need suitable ratings |
Size the food before sizing the purchase
Lay out a normal meal on your existing tray while it's cold. Look at the actual cooking surface, not the distance across its outer rim. Broccoli florets, fish fillets and potato wedges occupy space differently, so a universal servings label won't tell you much.
For meal ideas that help you plan ingredients together, Just Cook It's a practical dinner guide for busy cooks is a useful starting point. Choose the meal first, then check whether its ingredients can share the available surface without overlapping.
Buy for the meal you regularly cook, not the smallest tray you can store.
For pieces intended to brown separately, a finger's width between them is a useful starting check rather than a fixed cooking rule. Then count the batches your usual weekly cooking would require. A slightly larger, permitted tray may save more effort than a miniature pan that's constantly overloaded.
Materials Compared, Including Titanium
Small oven tray materials compared
| Material | Weight | Heat response | Corrosion and coatings | Main trade-off |
|---|---|---|---|---|
| Uncoated aluminium | Light | Heats and cools quickly; thin sheets can heat unevenly | Can react with acidic food; anodising changes the surface | Thin construction can warp |
| Carbon steel | Medium to heavy | Holds heat well once heated | Uncoated steel needs protection against rust | Requires drying and seasoning care |
| Stainless steel | Medium to heavy | Slower heat response than aluminium | Corrosion-resistant; available uncoated | Food can stick without suitable preparation |
| Non-stick coated metal | Light to medium | Base metal determines heat response; coating sets additional limits | Coating can scratch and wear | Easy release, but a finite coating life |
| Uncoated titanium, with 99.9% purity where documented | Light | Conducts heat far less readily than aluminium; browning may be patchy | Corrosion-resistant; check composition and coating claims | Premium cost doesn't guarantee better baking |
Fast heat versus easy maintenance
Aluminium is a sensible starting material for general baking because it responds quickly to oven heat. Construction still matters: a flimsy sheet with a weak rim is a different proposition from a sturdier pan. Acidic foods can also react with bare aluminium, so choose an appropriate surface or suitable liner for tomato-heavy dishes.
Carbon steel suits cooks who accept a maintenance routine in exchange for a durable cooking surface. Dry it promptly and protect its seasoning. Don't buy uncoated carbon steel if you know you'll leave it soaking overnight or put it away damp.
Stainless steel removes the seasoning requirement, but it isn't naturally non-stick. Oil the food or tray appropriately, and let browned food release rather than immediately scraping at it. A heavy pan can be durable while still feeling cumbersome in a narrow oven.
Coating convenience has a lifespan
Non-stick trays make delicate food easier to lift and washing less demanding. The trade-off is that the surface can wear, and the coating's documented heat limit matters as much as the underlying metal.
According to 6Wresearch's Australia non-stick cookware market report, Australia's non-stick cookware imports grew 10.47% from 2023 to 2024, with baking trays included in the category. That measures imports, not coating durability or cooking performance. Choose by construction and care requirements, not popularity.
For a broader comparison of pan construction and intended use, the guide to baking sheets for the oven can help distinguish surface claims from practical features.
What titanium does and doesn't solve
Titanium offers low weight and strong corrosion resistance. For an uncoated product, claims such as microplastic-free, BPA-free and documented purity should describe the actual finished item, not just the raw metal.
Those properties don't establish even heat distribution. Titanium conducts heat far less readily than aluminium, so thin, single-layer construction may show differences in browning across the surface. Thickness, shape and the oven's heating pattern all matter.
The best tray heats evenly in your oven, not the one with the most impressive material label.
Run a familiar recipe before relying on a new titanium tray for delicate baking. Also distinguish a verified material specification from an explicit oven-use rating. One doesn't substitute for the other.
Heat Limits, Placement and Fixing Bad Results
Choose a tray for the appliance's operating conditions, not just the temperature printed in tonight's recipe. The IKEA Australia LAGAN oven manual specifies ovenproof cookware suitable for approximately 250°C and warns against placing cookware directly on the oven bottom. Concentrated heat can damage the oven liner as well as spoil the food.
Compact appliances also impose constraints beyond the tray's footprint. The Westinghouse oven buying guide places small built-in ovens around 30–45 litres, but that category isn't a compatibility standard. Read the exact appliance manual for accessory dimensions, food loads and permitted shelf positions.
Set up a controlled first cook
- Find the oven's maximum setting. Include any grill or specialist mode you intend to use. Permission for ordinary baking doesn't automatically mean permission beneath an exposed grill.
- Check the tray's documented rating. Prefer a tray rated for the appliance's full intended operating range. Check separate limits for handles, coatings and removable components.
- Use the supplied shelf or approved supports. Never improvise a cooking position on the oven floor.
- Keep the fan and elements unobstructed. Centre the tray where the manual directs, with food contained below the permitted clearance.
- Watch the finish. Dark, non-reflective surfaces absorb radiant heat more readily than bright ones. Check the first batch early rather than assuming your old timing will transfer.
- Record what happened. Note the mode, shelf position, tray and result alongside the recipe.
Keep the basic placement checks visible while you establish a reliable setup.
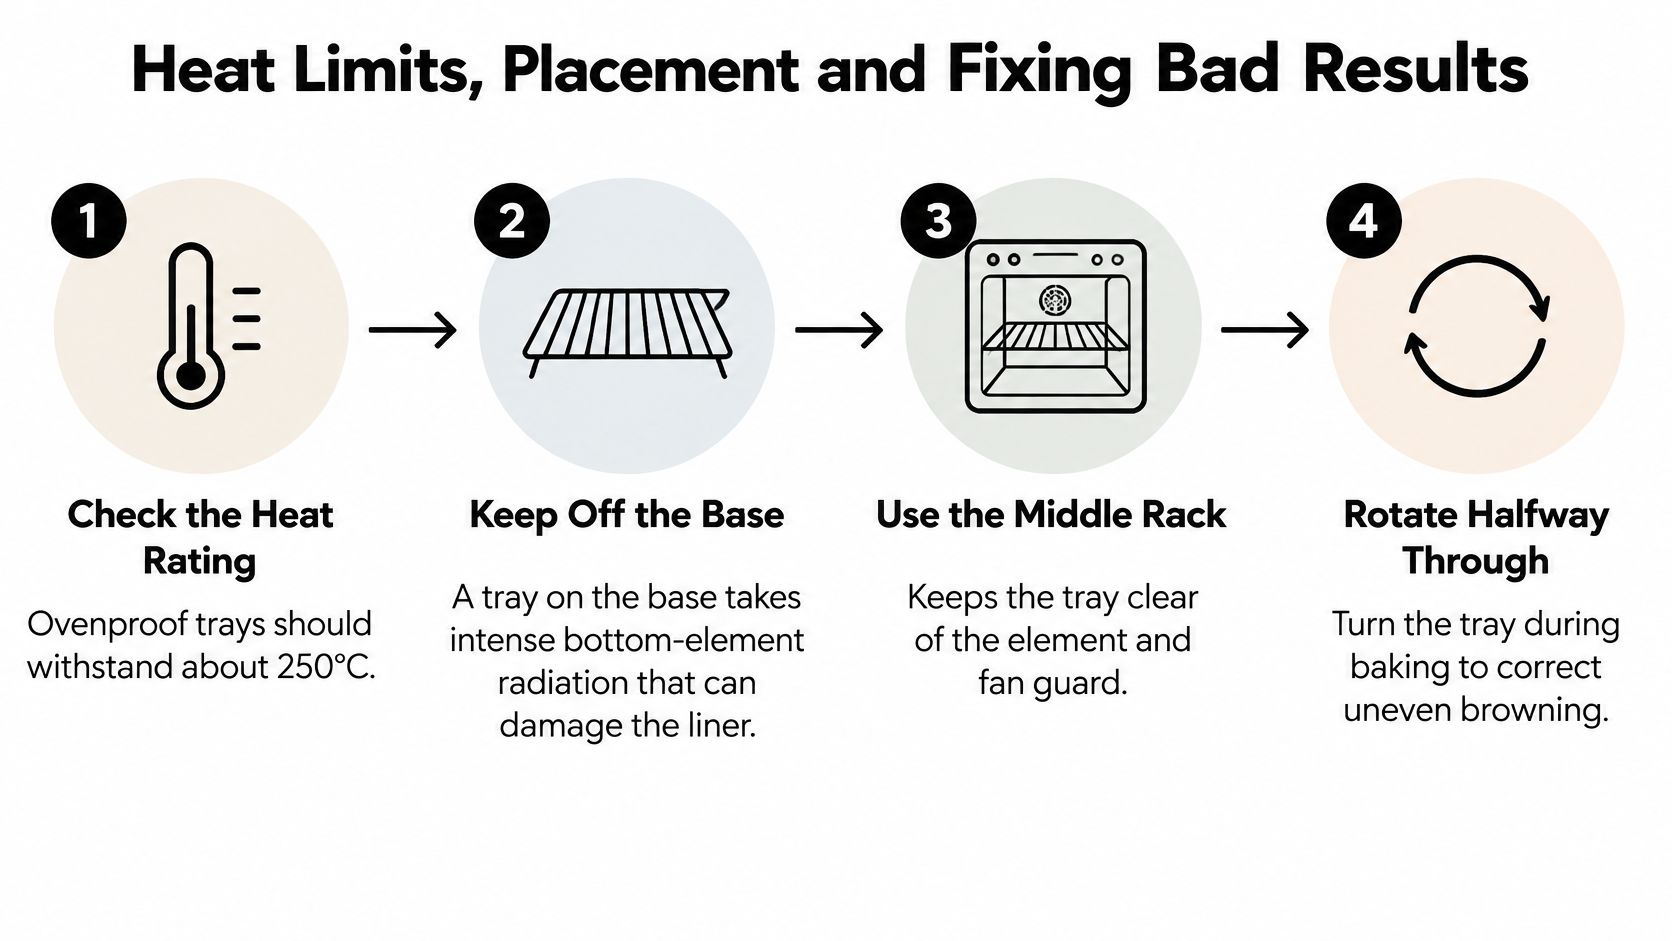
A middle shelf is a starting position only when the appliance and recipe permit it. Some compact ovens have restricted shelf choices, so the manufacturer's instructions take precedence over generic diagrams.
For more detail on interpreting product suitability, consult the guide to oven-safe cookware. Don't treat the absence of plastic parts as proof that an item is approved for oven use.
Diagnose the result before replacing the tray
Small oven tray symptoms, causes and fixes
| Symptom | Likely cause | Fix |
|---|---|---|
| Pale or wet centre | Oversized tray restricting circulation, or crowded food | Reduce the load; use a smaller permitted footprint if circulation is restricted |
| Burnt base | Tray on the floor or too close to the bottom element | Move to an approved shelf position |
| Uneven browning front to back | Local hot spot or off-centre placement | Centre the tray and rotate partway through if the recipe permits |
| Browns faster than the recipe says | Dark finish absorbing more radiant heat | Check early, then adjust temperature or time |
| Warping or rattling | Thin construction or abrupt temperature change | Let it cool before washing; consider sturdier construction |
| Food sticking | Worn coating or unsuitable preparation of bare metal | Replace a failing coated tray; prepare uncoated metal appropriately |
Change a single variable between tests. If you change the tray, shelf position and temperature together, you won't know which adjustment helped. Keep the food load comparable too.
For delicate baking, use a repeatable recipe rather than an improvised batter. TOO MATCHA's precise ratios for matcha cake provide a useful example of why ingredient proportions should stay consistent while you assess equipment.
Don't transfer timings between tray finishes until you've checked the result. Retire a tray with a flaking coating, persistent corrosion that can't be safely cleaned away, or a permanent warp that makes it unstable on the shelf. Slight temporary movement during heating is different from a pan that rocks while you're lifting hot food.
Cleaning and Utensil Habits That Protect Your Tray
- Let the tray cool until warm. Don't take a hot pan straight to the tap. Abrupt cooling can distort the metal, and steam or splashing fat can burn you.
- Loosen residue with warm soapy water. Soak coated trays and corrosion-resistant bare metal briefly where the care instructions permit. For uncoated carbon steel, soften the residue without prolonged immersion.
- Use a soft sponge or nylon brush. Work along the rim and into corners where grease collects. Steel wool and abrasive pads can damage coatings and decorative finishes.
- Treat stubborn deposits gently. A paste of bicarbonate of soda and water can help on compatible surfaces. Test discreetly and avoid it where the manufacturer warns against alkaline cleaners, particularly on vulnerable finishes.
- Rinse and dry completely. Check rolled edges and seams for trapped water. Uncoated carbon steel needs prompt, thorough drying.
- Protect bare carbon steel. Apply a thin film of suitable cooking oil before storage, following its seasoning instructions. The surface shouldn't feel wet or sticky.
Use tools that match the surface
Cleaning damage often starts during serving. A sharp corner on a turner can gouge a coating before the tray reaches the sink.
- Coated surfaces: Choose silicone, wood or suitable heat-resistant nylon utensils. Replace tools with rough or damaged edges.
- Uncoated metal: Use a metal spatula only where the manufacturer permits it. Keep the edge flat rather than digging into the surface.
- Cutting and portioning: Move food to a chopping board. Cutting directly on a tray can scratch the pan and dull the knife.
- Stacking: Put a soft separator between trays if their bases would otherwise rub against a coated cooking surface.
The guide to silicone utensils in Australia explains another useful distinction: a utensil's suitability depends on its construction and heat rating, not just the material named on its packaging.
Storage check: Put the tray away clean and dry, with nothing heavy pressing against a vulnerable rim.
Dishwasher suitability is product-specific. Detergent, heat and repeated machine washing can affect finishes differently, so check the tray's care label before putting it in the machine. A dishwasher-safe claim for another item made from the same metal doesn't establish that your tray is suitable.
Confirm Your Measurements and Choose Your Tray
For renters and benchtop-oven owners, choose a compact tray that handles your normal meal comfortably without awkward loading or removal. A smaller pan is useful when it makes the appliance easier to use, not when it creates constant extra batches.
For small built-in ovens, favour sufficient cooking surface within the documented accessory limit. Outdoor and travel cooks should balance low weight against rigidity and the permitted heat source. A lightweight tray approved for a domestic oven isn't automatically suitable over a campfire.
Make the purchase decision in order
- Write down usable width, depth and height. Compare these with the product's overall dimensions, including handles and rims.
- Confirm temperature and mode compatibility. Look for explicit documentation, not an assumption based on the metal.
- Match the cooking surface to your normal portions. Allow for the foods you prepare most often.
- Choose maintenance you'll follow. Budget for construction and usability, not just a premium material name.
For cooks seeking uncoated equipment, documented composition is useful, but it doesn't replace appliance compatibility. Our titanium range includes cutting boards, cookware and drinkware; the standard and smaller chopping boards are preparation tools, not items to assume are baking trays. Check the individual product page for an explicit oven-safe rating before buying any titanium item for that purpose.
Measure today, then buy the tray that clears all your requirements. If the listing omits overall dimensions or a temperature rating, resolve that omission before ordering.
We offer titanium cutting boards, cookware and drinkware for everyday kitchen use. Visit Everti to compare the range, and check the intended use and documented heat rating of any item you're considering for your oven.